The extra effort required to make a quality piece of furniture pays off in spades.
If you were an avid watcher of “reality” TV shows, your opinion of what was possible with timber would be limited to basic, chunky pieces of furniture, consisting of not much more than some slabs of timber quickly joined, sanded and finished. These then are presented as items of quality furniture that could command surprising prices in certain boutique stores.
The joinery methods used are rarely anything more than butt joints that are glued and screwed. Sanding is a quick once-over with a random orbital sander if you are lucky, or a belt sander if not, and the finish is splashing on some stain or varnish.
While this does produce one style of furniture, the same timber, with just a little more effort, care and finesse can create a quality piece that can become quite the talking point, as well as being very functional.
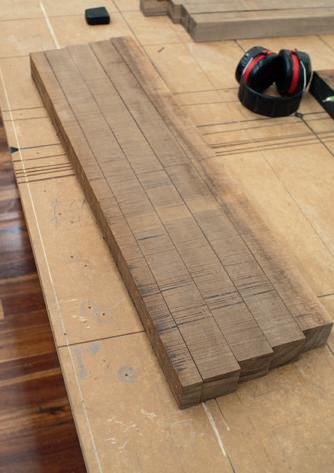
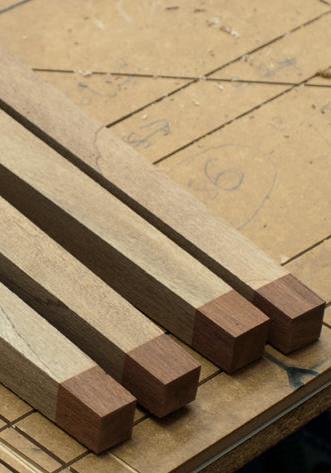
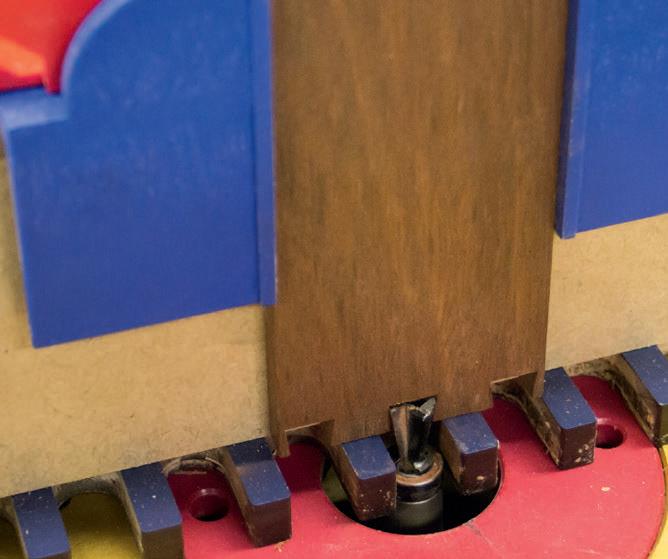
1: The raw material for the legs 2: Detail of the bottom of the legs with contrasting tip
For this project to make a hall table, I chose a slab of mahogany and some West Australian jarrah to be a contrasting highlight piece. While I had access to a bandsaw, jointer and thicknesser that allowed me to break down a larger slab of timber into correctly-sized pieces, you can get timber that is cut closer to the required dimensions to save some of the preliminary work.
I personally find it particularly rewarding being able to produce all the pieces that I want and it gives me the freedom to choose sizes that particularly suit the project, rather than accepting the dimensions of timber that are available. If I had to start over putting together a workshop, one of the very first machines I would get is a decent bandsaw. So much can be done with that one machine and some good blades.
Taking the first slab, I used some chalk to rough out where I would cut the various pieces—the legs, skirts, rails and the top of the table.
1: Clamping the front skirt together 2: The front skirt with the drawer cavity 3: The skirts and legs with mortices cut and floating tenons inserted, ready for assembly. 4: Dry fit of the frame
Cutting the legs
In this case I started with a thick slab of timber a little longer than the legs I wanted to make. If you had some thinner stock, the legs could be cut from a long length—it doesn’t really matter in the end. The slab was ripped into four equal widths (there was a thin piece left over), then each piece flipped onto its side and run through the saw again. This ensured the stock for the legs was square.
Next, each leg was tapered on two adjoining faces, ensuring that the taper would be to the outside corner of the table. There are a number of ways you can achieve a taper, either on a tablesaw with a taper jig (a home-made one works just as well as any commercial version and only takes a few screws and a couple of pieces of wood), the bandsaw, a jointer or even a thicknesser with a jig can be used (and for the very keen and energetic, hand tools). For this project, I used a jointer technique to create the taper (effectively creating and exaggerating snipe in a controlled manner). It consists of making a number of passes of the leg over the jointer, initially starting at a point 200 mm from the end of the leg and making a first pass. The second pass is started 200 mm further on and this is repeated a couple of more times. The final passes are the entire length of the newly created taper, cleaning up all the snipe marks from the start of each cut. It is a surprisingly easy technique and the results are a lot more consistent than you would logically expect.

1: Clamping up the table frame 2: Components for the drawer cut and sized
I did experience some tearout at the bottom of the legs—either a blunt blade, or the timber had a tendency to chip which left a rather unsightly problem. However, in woodworking there are not so much problems as opportunities you have yet to discover. The solution was to cut the ends off the legs and join a contrasting piece of timber on the bottom to create an interesting detail. It’s something I wouldn’t have thought of doing if the tearout hadn’t happened and it adds additional styling to the legs. They were attached with glue and a floating tenon to add strength. I used the Festool Domino for this job, but a small biscuit or dowel would have worked just as well.
1: Using the Gifkins jig to cut dovetails for the drawer 2: Dry fitting the drawer components
Structural unit
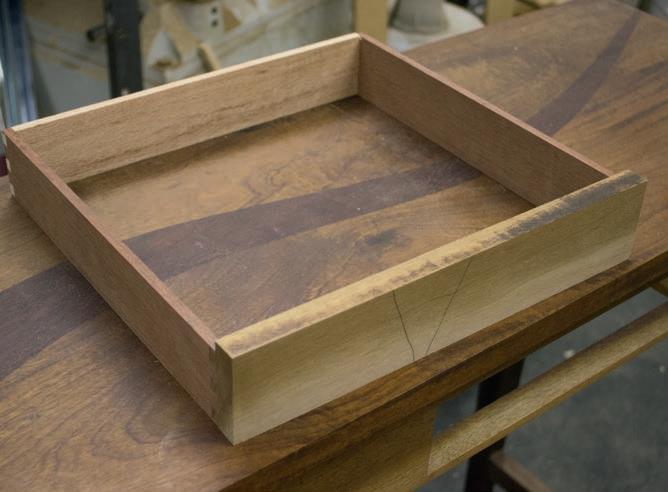
The skirt around the edge is also the main structural unit for the table. I wanted a drawer in the table, so I ripped a strip of timber from the top and bottom of the front skirt, then the opening was cut out. The four remaining pieces were then reassembled with dominos (again biscuits would have also worked) and all glued together. With a clean cut on the tablesaw, the joints were virtually indistinguishable in the final product. The glue used in this case is a polyurethane glue. It is unusual in that it requires the parts being glued to be dampened on the contact surfaces and it foams out of the joint as it goes off. It is the same as space filler, except that the application does not involve deliberately aerating the product.
As a glue, it is very strong indeed, is waterproof (so perfect for outdoor applications) and, surprise surprise, is great at filling gaps. Once the glue was set, the clamps were removed and the excess glue scraped off. The skirt was made oversized, so the ends could be docked, leaving a front with a neat, square hole. You can cut the hole in other ways, but in this case I wanted to preserve the piece that was being removed for the drawer front. This way, when the drawer is closed, the grain and colouring will be continuous across the table front.

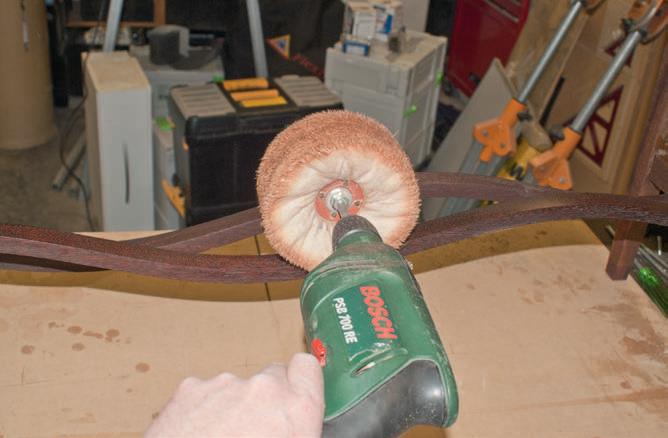

1: Testing the drawer front for fit. It has not had any finish applied, which is why it doesnt match 2: A side view of the drawer dry-fit — the drawer front creates a surrogate half blind dovetail 3: Polishing the rails using a Swansdown mop and wax 4: Getting the curve ready using the contour jig
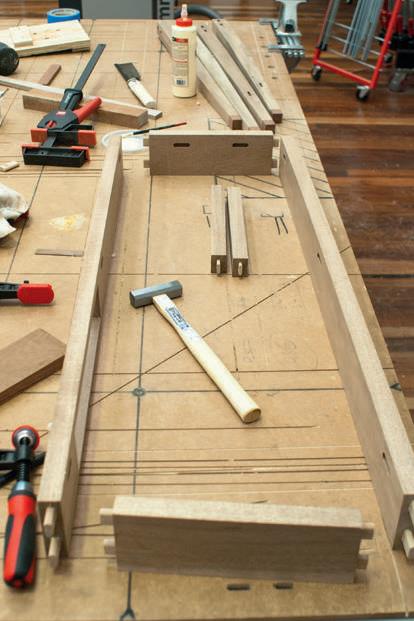
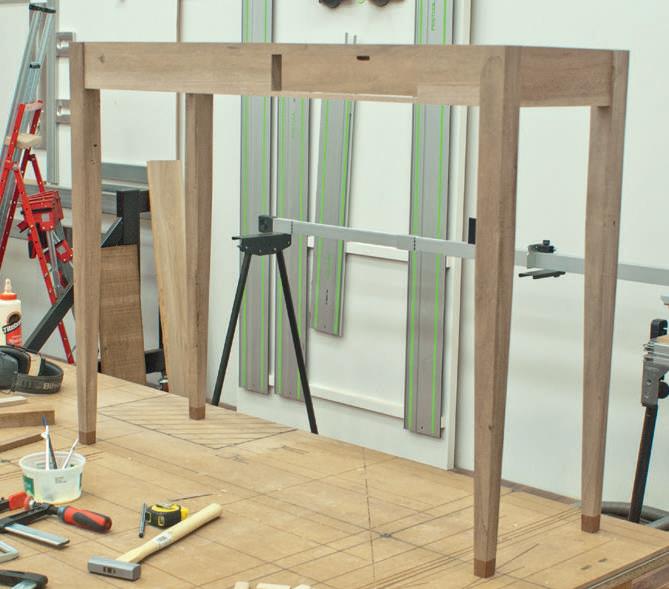
With the front skirt ready, it was time to assemble the body of the table. Floating tenons were placed in each skirt end and matching mortises cut in the tops of the legs. The whole assembly was dry fitted to ensure everything was right and then glued and clamped together. Again, the Festool Domino makes short work of cutting accurately located mortises for the floating tenons.
The drawer is a simple affair—a couple of rails inside the carcass of the table for the drawer to rest on and the drawer itself is a simple dovetail box with a base. Using the Gifkins dovetail jig made for short work of the drawer and the piece originally cut out of the front of the skirt is then attached to the front of the drawer, so it blends in.
Dry fit of the resulting top
Mahogany top
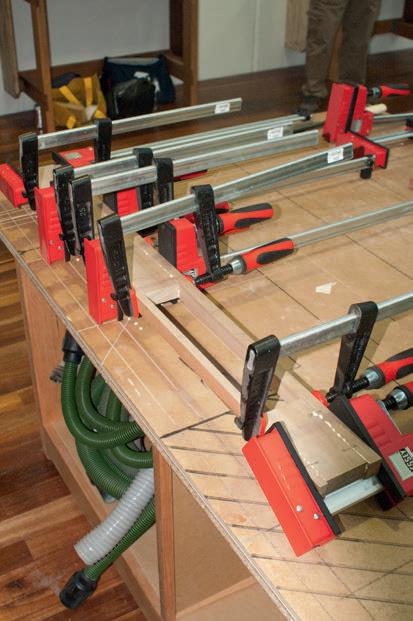
With the body of the table assembled, it was time to move onto the top. A piece of mahogany was docked in half, then the two pieces brought together in various configurations until the grain patterns matched in the most aesthetic way. There is more than one way to prepare two surfaces for gluing. One is to use a jointer and each piece has the gluing edge planed at and straight. This is pretty common, but if you don’t have a jointer (or a jointer plane), then one of the other methods needs to be employed. One that is particularly interesting is to use a circular saw that has a rail and a glue-line rip blade. The glue-line blade is particularly designed to produce a very smooth cut, so that the resulting surface is immediately ready for gluing without any further preparation. By using a rail, the blade can be set to run down the joint between both boards, so both surfaces are cut exactly the same, ready for glue and clamping.
The clamps used in this case are the Australian-made Frontline panel clamps, which can apply significant pressure to bring the boards together, but they also apply a proportion of that pressure vertically, ensuring the boards remain at across during clamping.
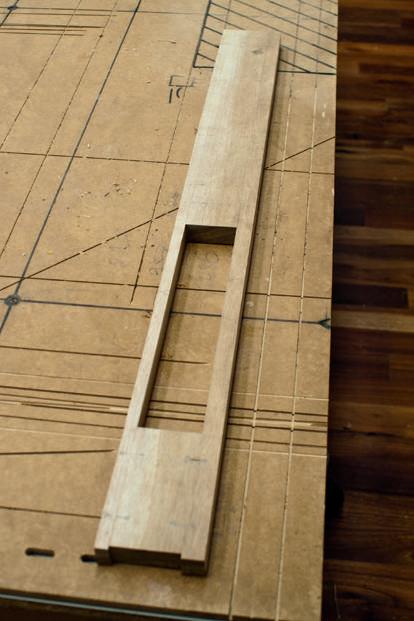
The top being rejoined with the jarrah river inserted and ready to be clamped up
Jarrah detail
However that was only the start for this top—I had a plan to pick up the jarrah detail used on the leg tips and create a jarrah river through the top as well. Taking the newly-made top, it was split apart on the bandsaw in an artistic curve. A piece of jarrah was sized to the same thickness as the top, then matching curves were cut to produce a solid insert. The Frontline contour jig was used on the bandsaw which allowed these cuts to be made accurately. It could have also been done with a template and router. The pieces were dry fitted together, then transferred across to another set of the powerful Frontline clamps for the glue-up.
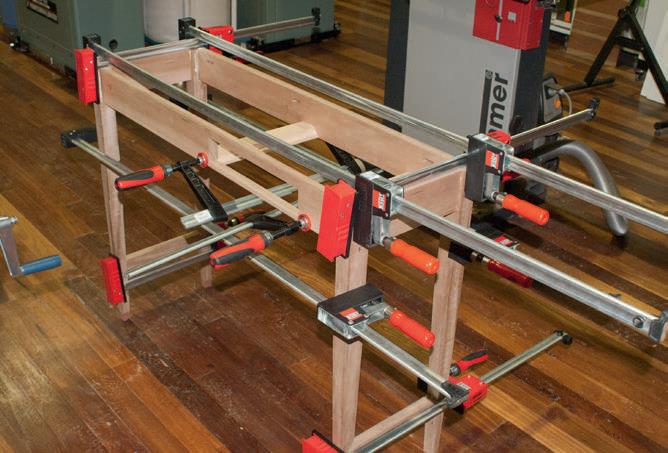
The table assembly complete, ready for sanding and scraping, then finishing
After cutting the jarrah for the top, it became obvious how I wanted to make the lower shelf to support the legs. I decided to have curvy rails rather than a traditional shelf or straight rails. The same curve was used from the top for two rails. These were then set opposite (and flipped) one from the other to create a more dynamic, non-linear result. Fortunately I had the jig to cut the curves, as during the first glue-up of the bottom rails I was just too enthusiastic with the clamp and the rails exploded into shrapnel. I didn’t make the same mistake twice.
With the components finished, sanded and scraped smooth I applied a Tung oil finish to really show off the beautiful timbers.
A “simple” hall table. As (not) seen on TV.
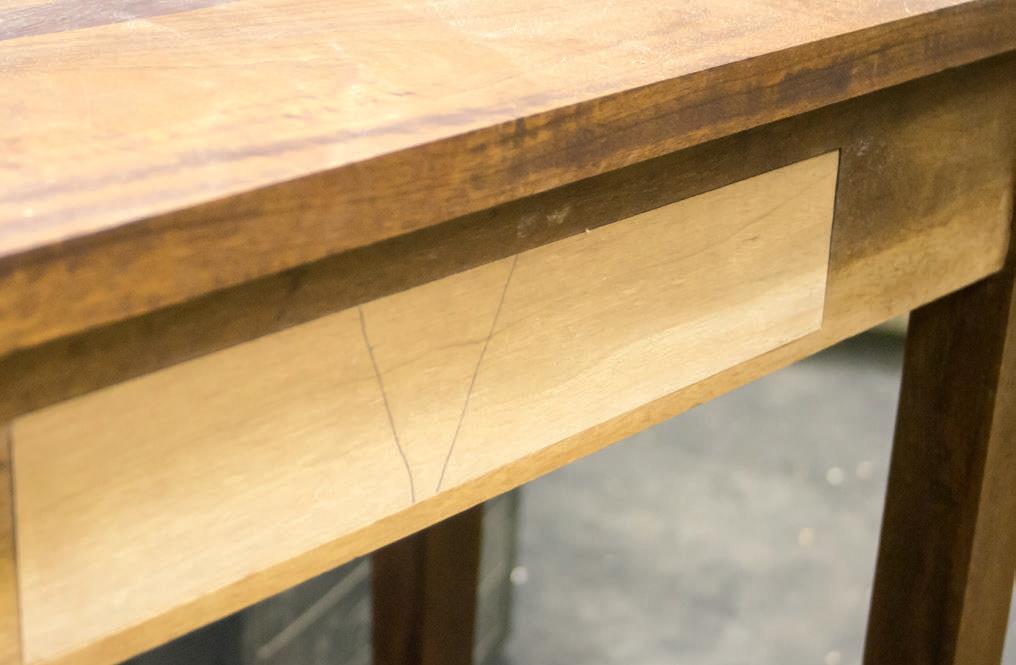
Detail of top with the finish applied