By John Craig
Vegetable-tanned leather and hand stitching produce a classic sheath
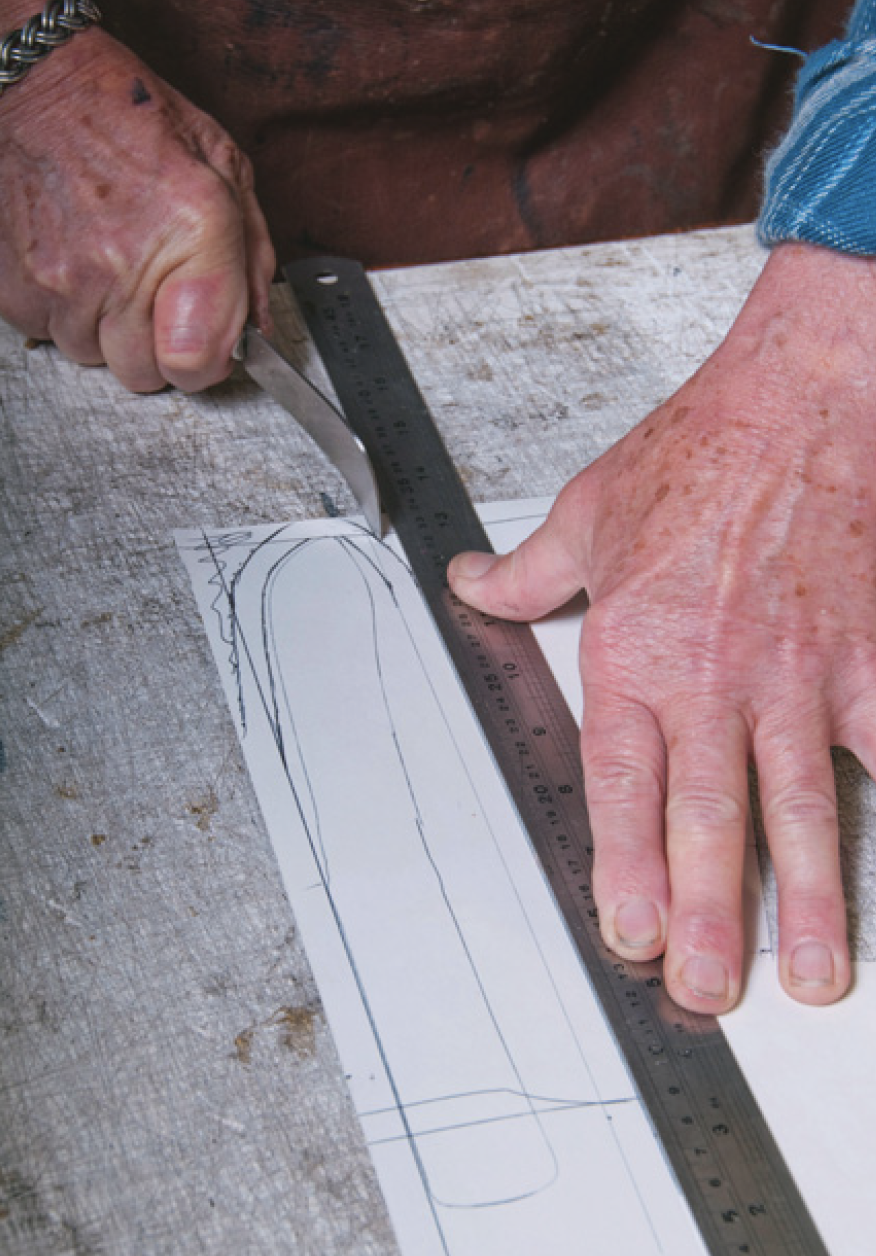
To make the best knife sheath, choose heavy leather which has been vegetable-tanned (see Panel, Vegetable tanning). Choose a light piece of cardboard to cut a pattern from and square a corner to start. Next measure 10 mm in from the side and bottom edge. This is the width of the spacer which I will come to later. Lay the spine of the knife that will be put in this sheath up against the 10 mm line (it’s usually the spine because mostly they’re straight). Using a pencil in an upright position, draw around knife, making sure the drawn line does not cross 10 mm line.
Now measure the widest part of knife which the sheath is being made for. For a skinner’s knife, the widest part is normally the blade, but in a general-purpose knife it’s probably the tang. Measure across and add 5 mm to actual width of the pencilled outline of the knife.Draw two parallel lines 10 mm apart which will show the width of sheath you are making.
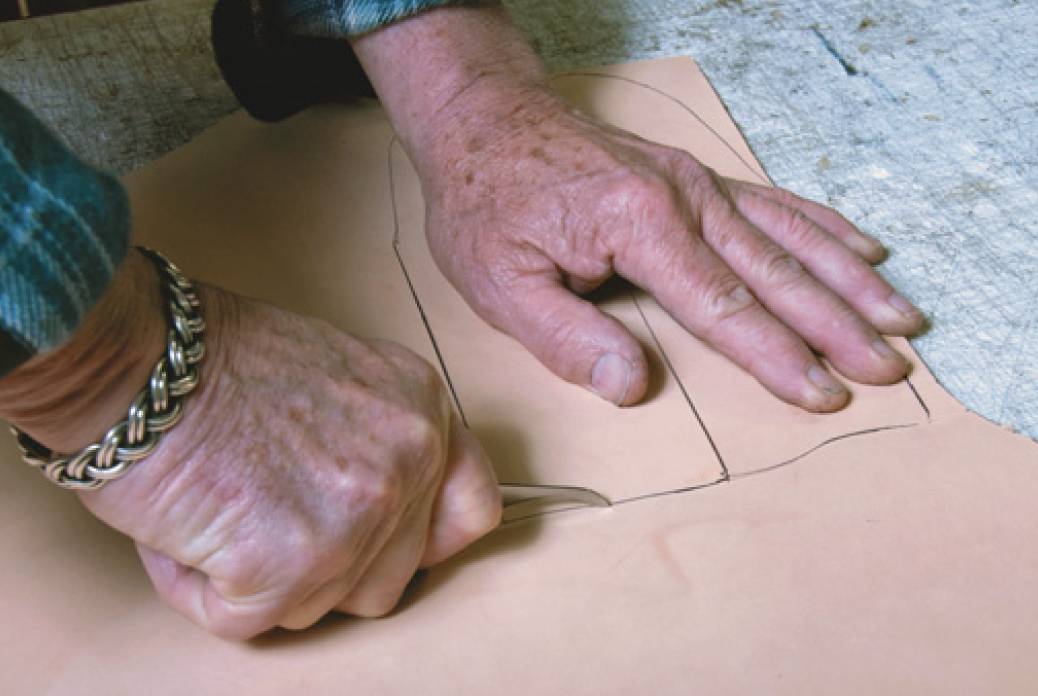
For pointed or curved blades, draw the lines following the blades, remembering to allow room for the blade to be put in the sheath and be withdrawn from it easily. I like to “bury” the knife into the sheaths that I make, leaving just enough handle so that a wet hand can grip and withdraw the knife without hindrance. So by this point, you have made the pattern.
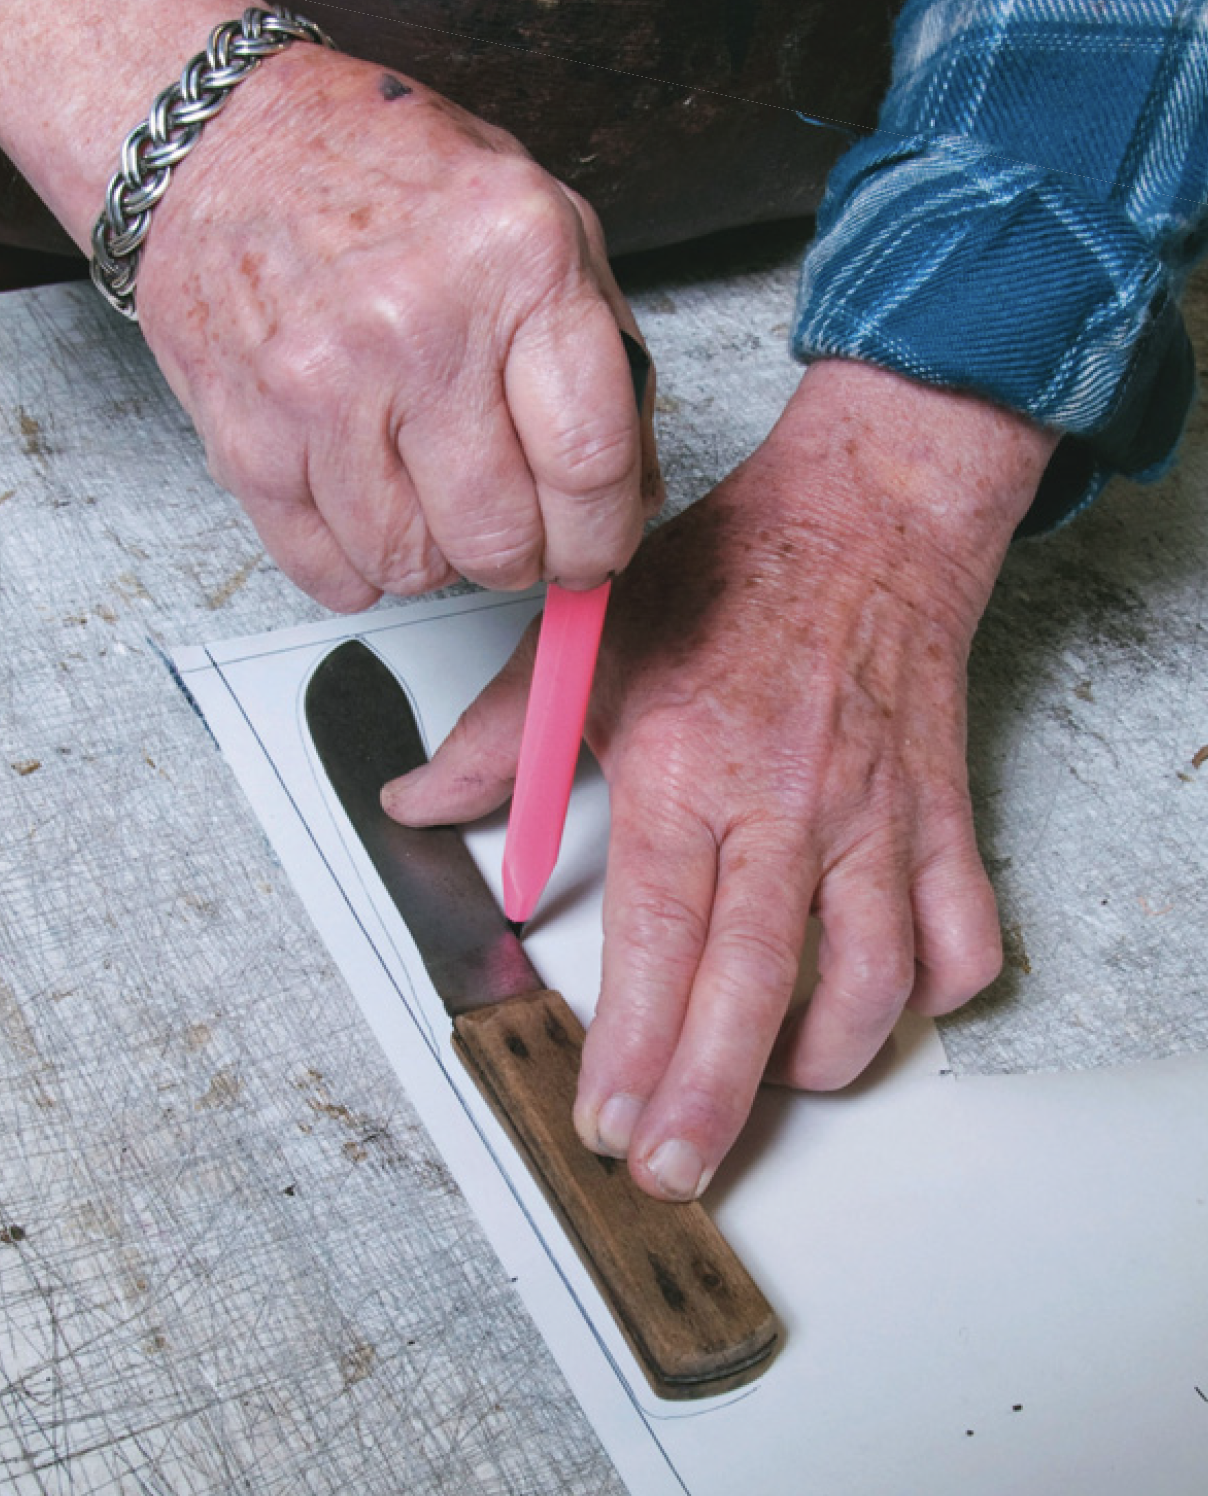
On cardboard mark out and…
…cut out
Hide
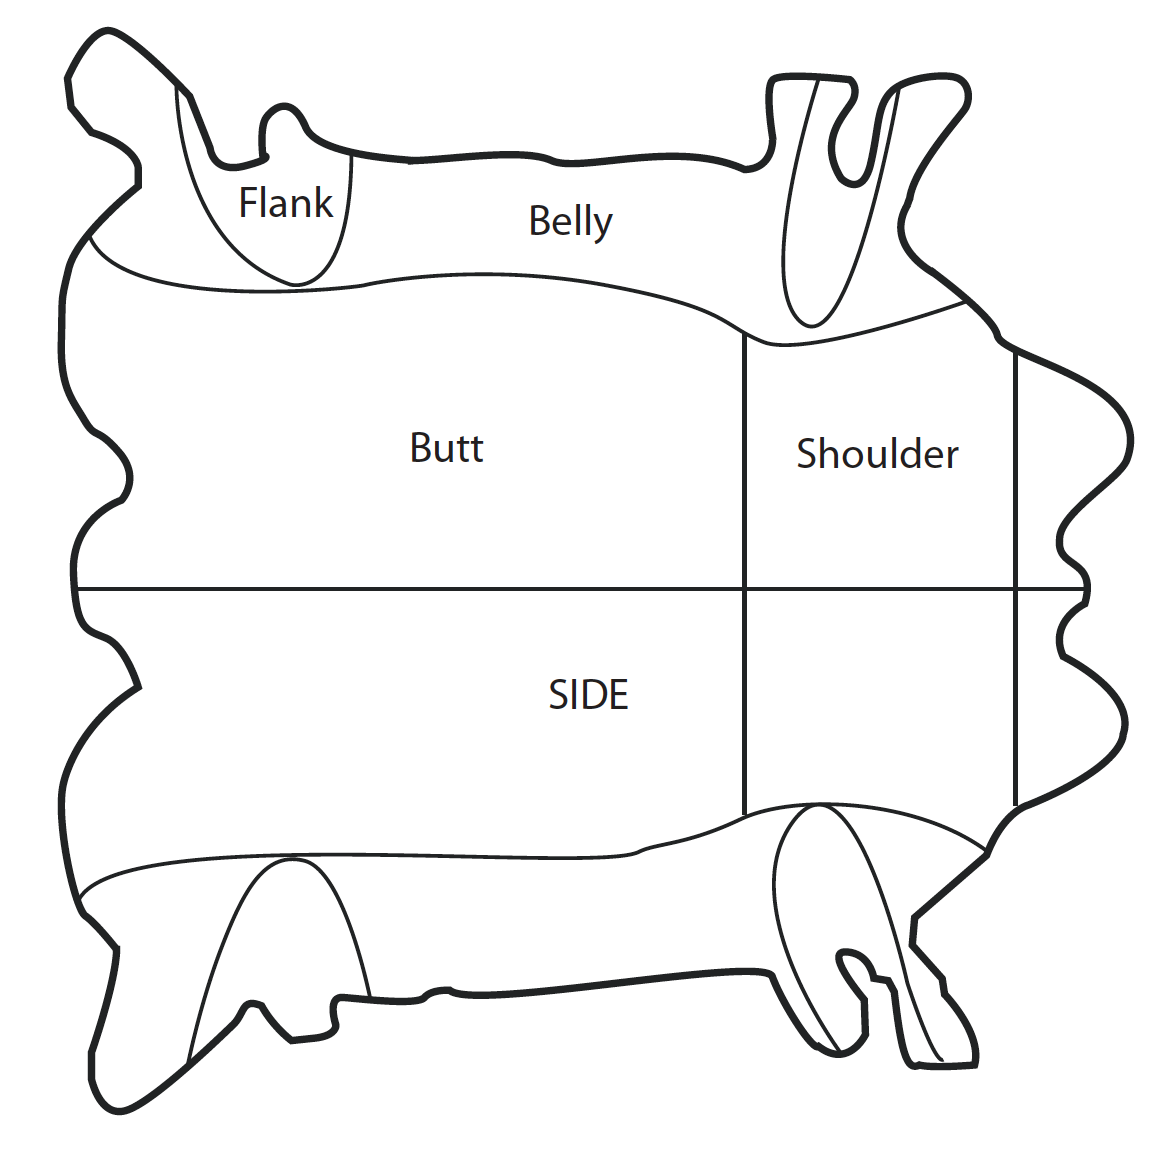
I make my sheaths from 3.5 mm russet. The laid-out hide is actually half the beast which has been split down the spine by the tanners. You will see there is a belly and two legs which is why it is known as a side of leather.
Long straps and knife sheaths are cut from the spine side. Lay your sheath pattern lengthwise, going with grain, as the natural stretch of the animal hide is needed later to stretch the sheath across. Make sure to check what side the knife will be worn on, because the orientation of the sheath will be decided when you are cutting out at this point.
Remember also to tumble the pattern if you are making a pair of sheaths. You will also cut the belt loop from this strong part of the hide. Make the loop as wide as possible, as this stabilises the sheath and holds it close to the body. Make a loop that will fit the belt with just enough move-ment to allow the knife to swivel backwards or forwards when the wearer is sitting down.
Spacer, steel
From the legs of the hide, cut a 10 mm wide spacer to go around the sheath, separating the front and back pieces. This can be in one piece or else butt-jointed at the bottom of sheath. I also make provision for a sharpening steel to be carried on this knife sheath. For the sleeve to hold this, cut a piece of leather from 2 mm thick.
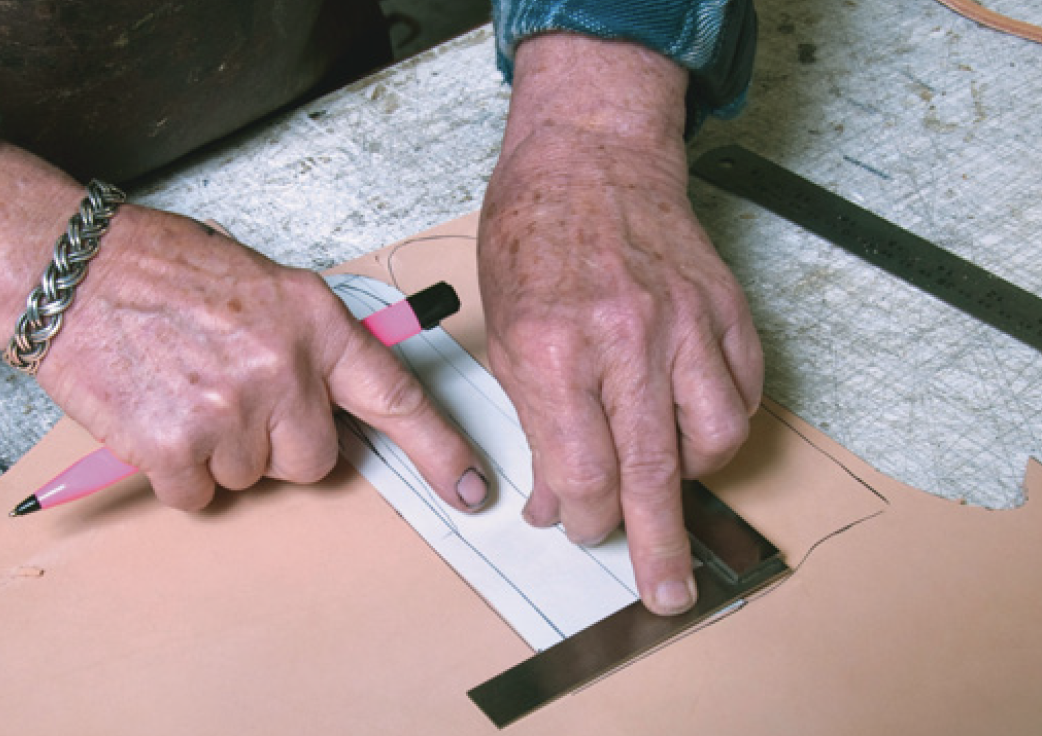
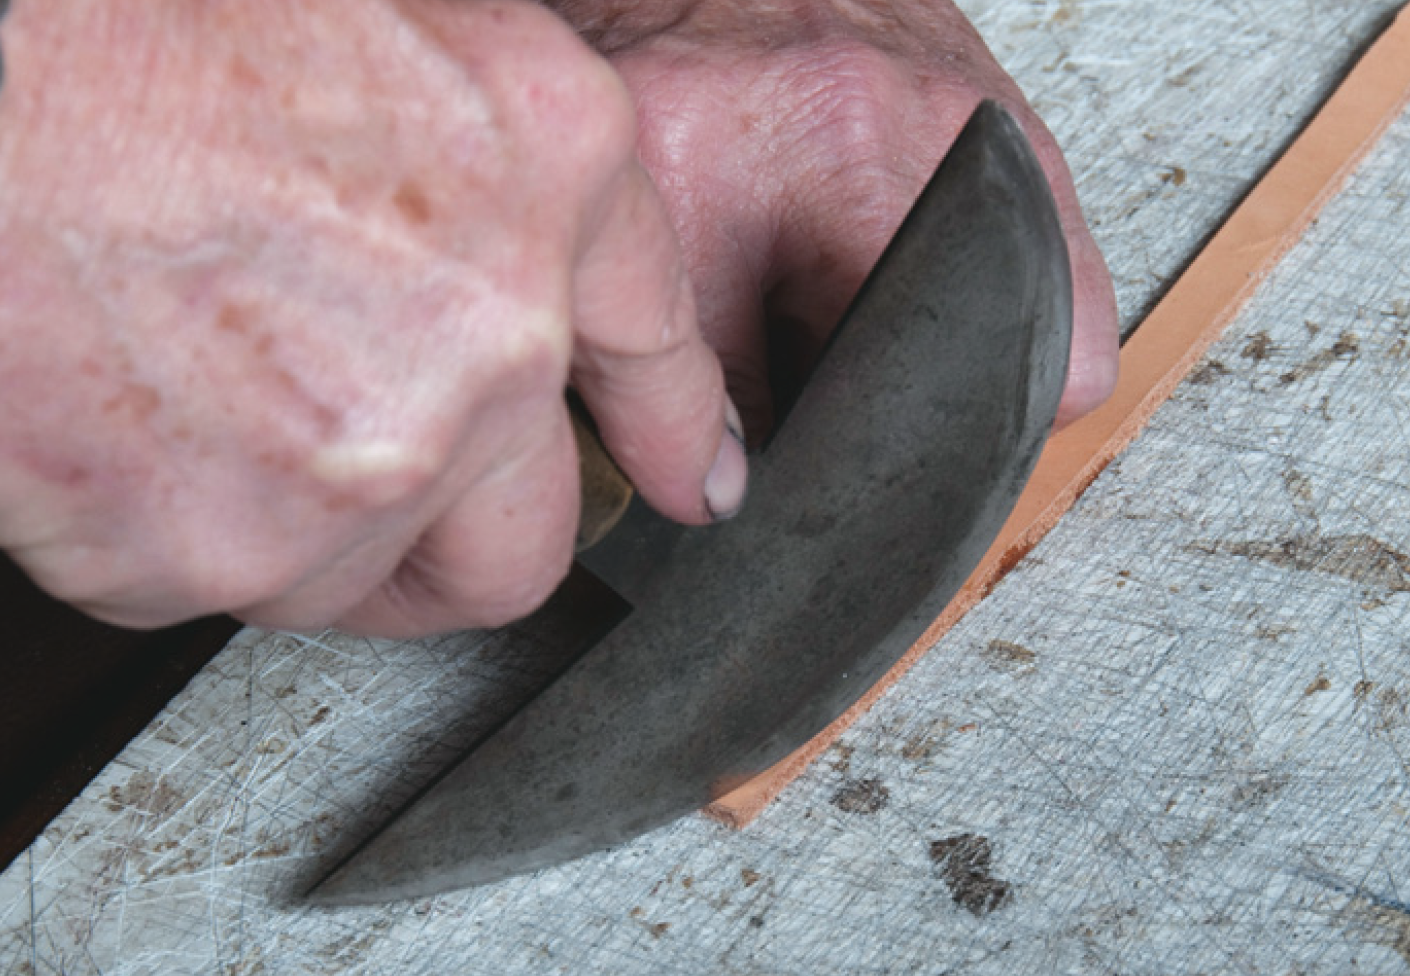
The pattern measurements for this are 40 mm wide at the top, 32 mm wide at the bottom and 180 mm long. Mark 8 mm in from both edges on the pattern. This will be used to mark the stitch line on the front of the sheath. Having cut out the parts, I now bevel the edges as the next step. This means I slice off an acute cut-edge with a tool called an edge beveller. A bevel rounds the edge of sheath to help pre-vent wear and tear.
Transfer to leather
Cutting out leather
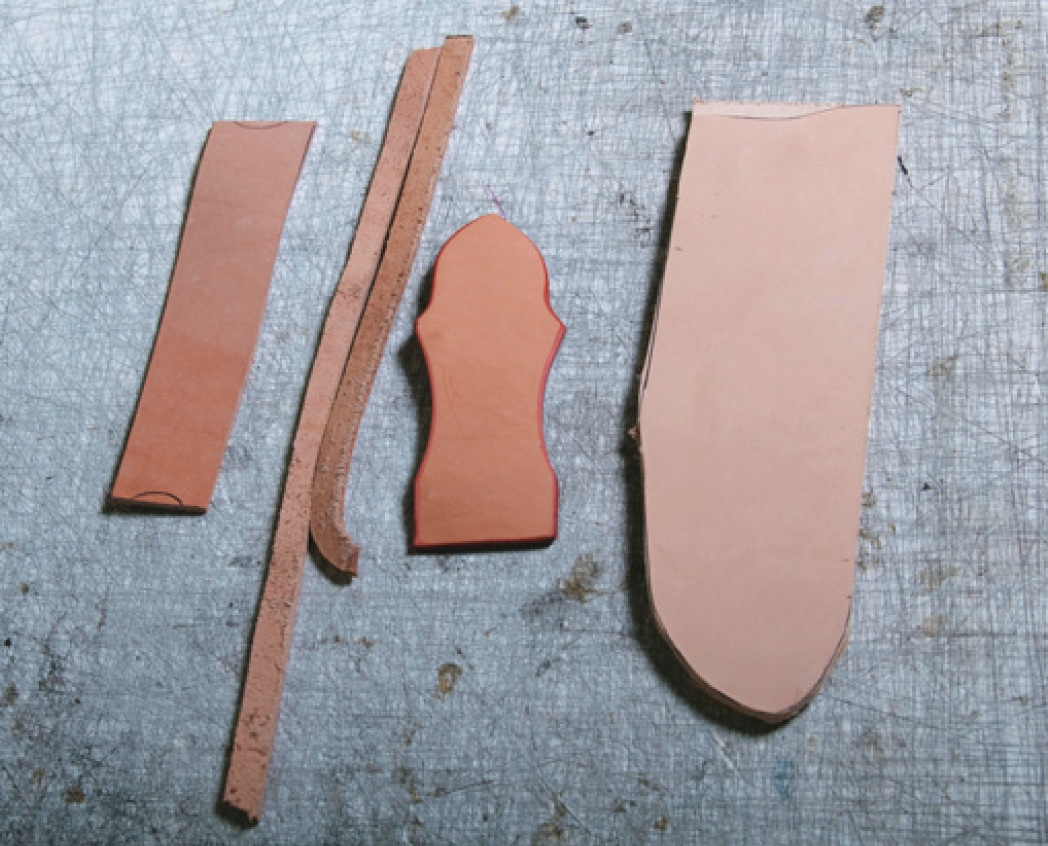
Leather pieces for (from left) sleeve for the steel, spacer strips, belt loop, sheath.
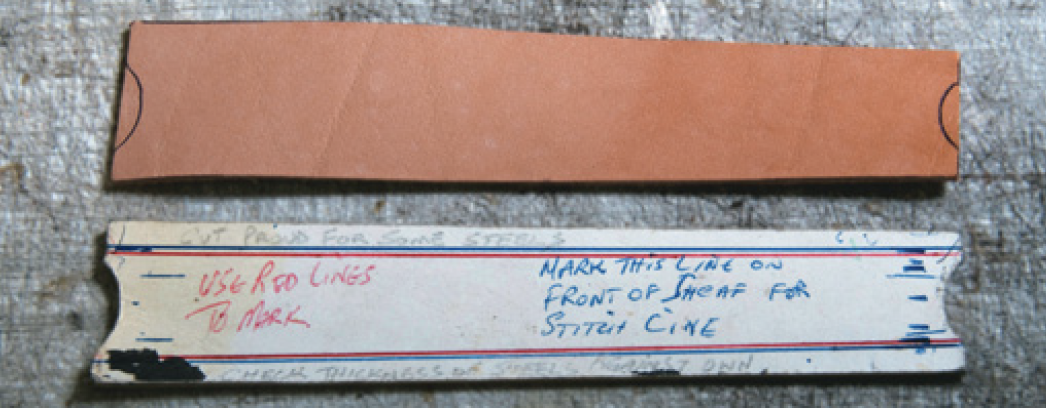
Steel cover (top) and template.
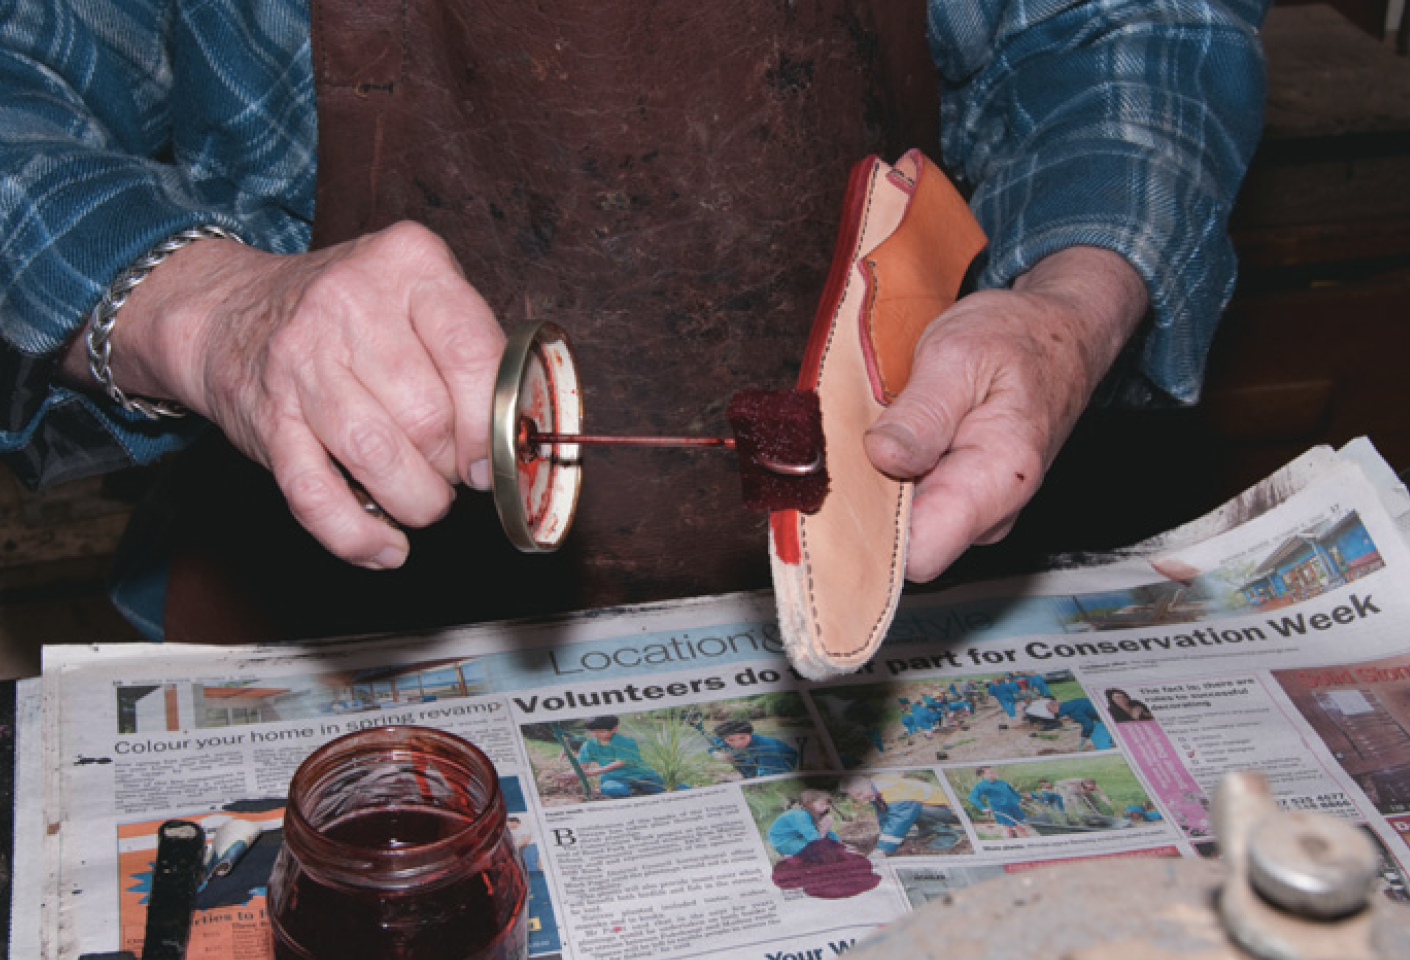
Stain
For the moment, only the edges of the steel sleeve, belt loop and top edges of the sheath will be stained. For this, I use a recipe handed down from my old departed saddler mentor; it is a mixture of stamp-pad ink, a teaspoon of tragacanth gum and water. Using a lightweight cotton-duck canvas, I rub the damp edges briskly. This quickly brings up a burnished look which takes care of the water-proofing of the edges.
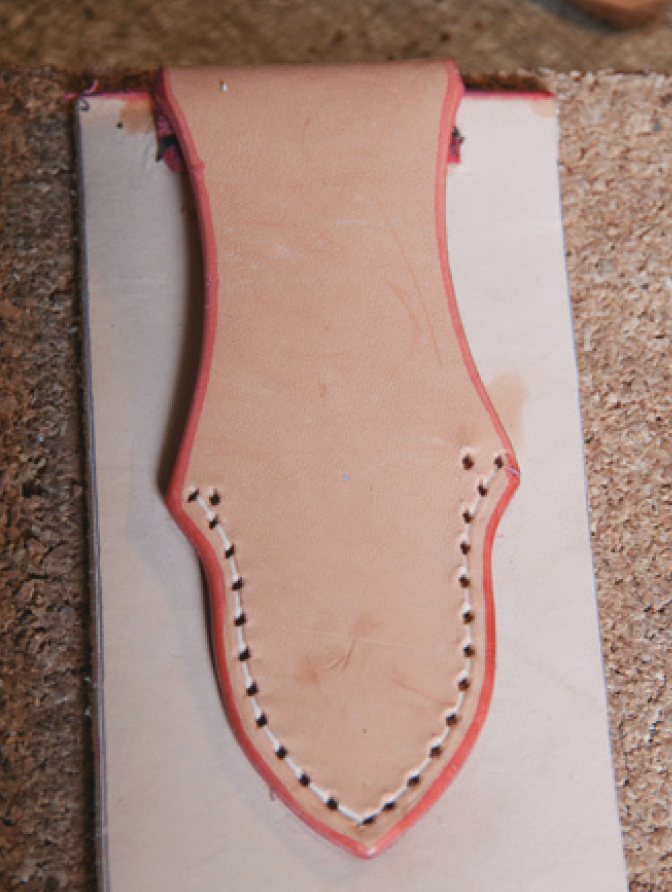
Aligning holes, allowing for steel sleeve to curve when stitched
Belt loop ready for stitching.
Cutting spacer
Holes for steel pouch
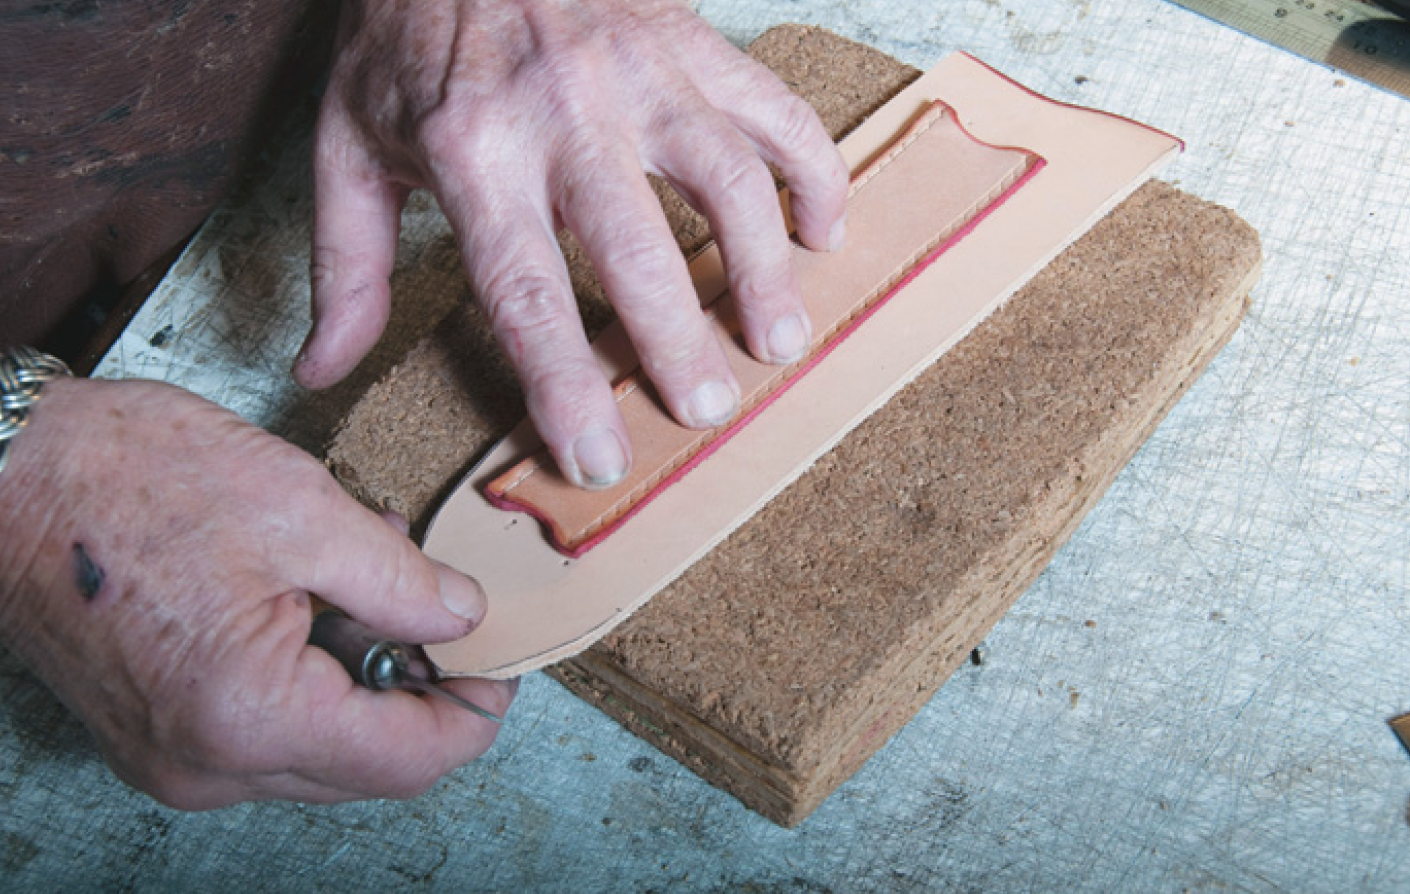
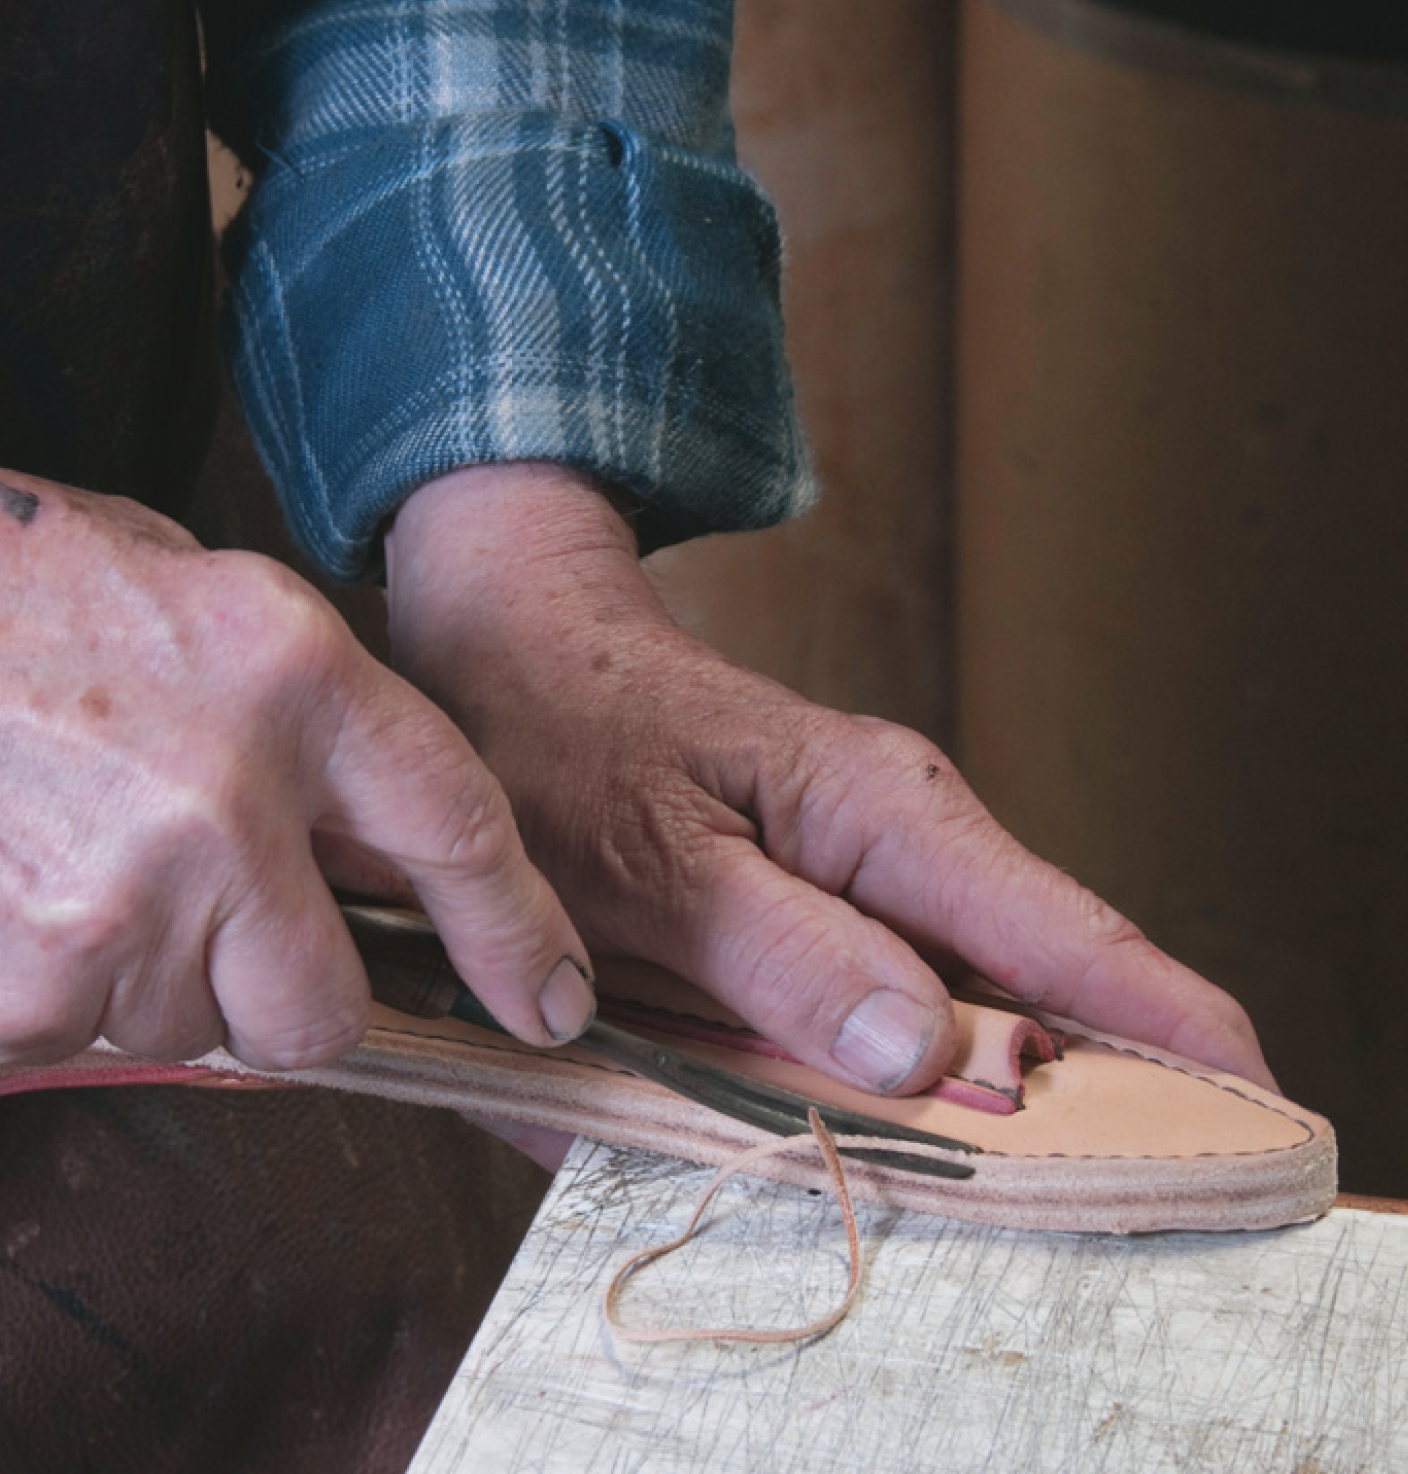
Place the pattern for the steel on the front of the sheath. Mark it with dots at the ends of the drawn 8mm lines. These four points will be the last stitched holes. In the piece of leather cut for the sharpening steel, cut a stitch-channel using a stitch groover. Using a No 5 stitch-pricking wheel (five stitches to the inch) and roll it down the channel to mark the stitch holes.
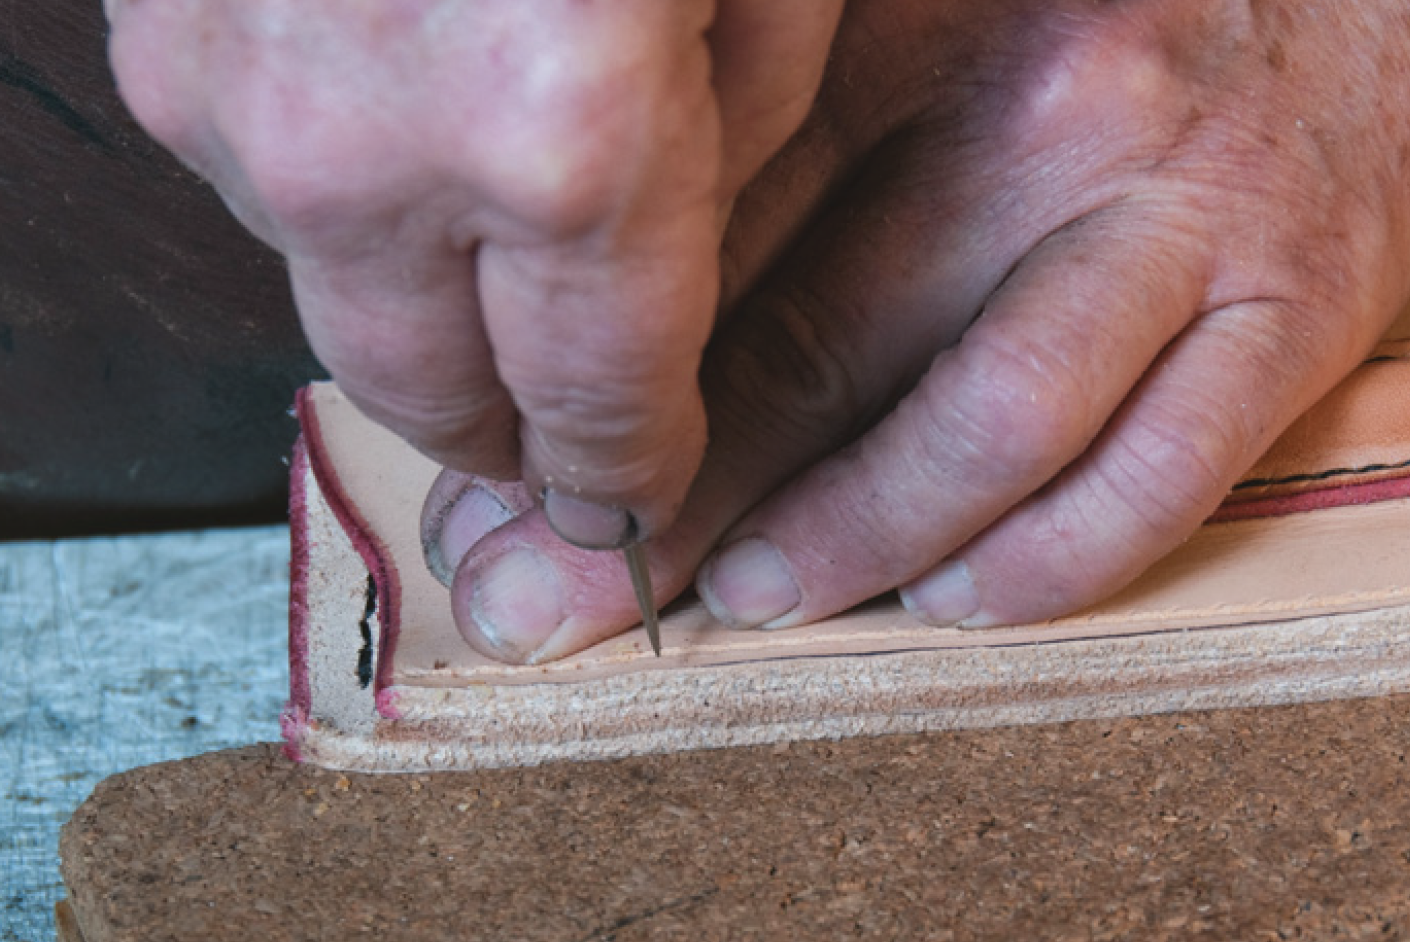
For support, rest the work on a pad of dense cork before stabbing the stitch holes. Now place the piece of leather between the dots on the sheath front. Hold it steady and stab marks on it using a diamond awl. Keep one edge of the blade flat along the channel for the correct angle. This angle allows the thread to lie correctly and also gives the greatest strength to the edge. Once one side has been done, slide the piece of leather carefully across to line it up between the dots for the other side to have its holes stabbed.
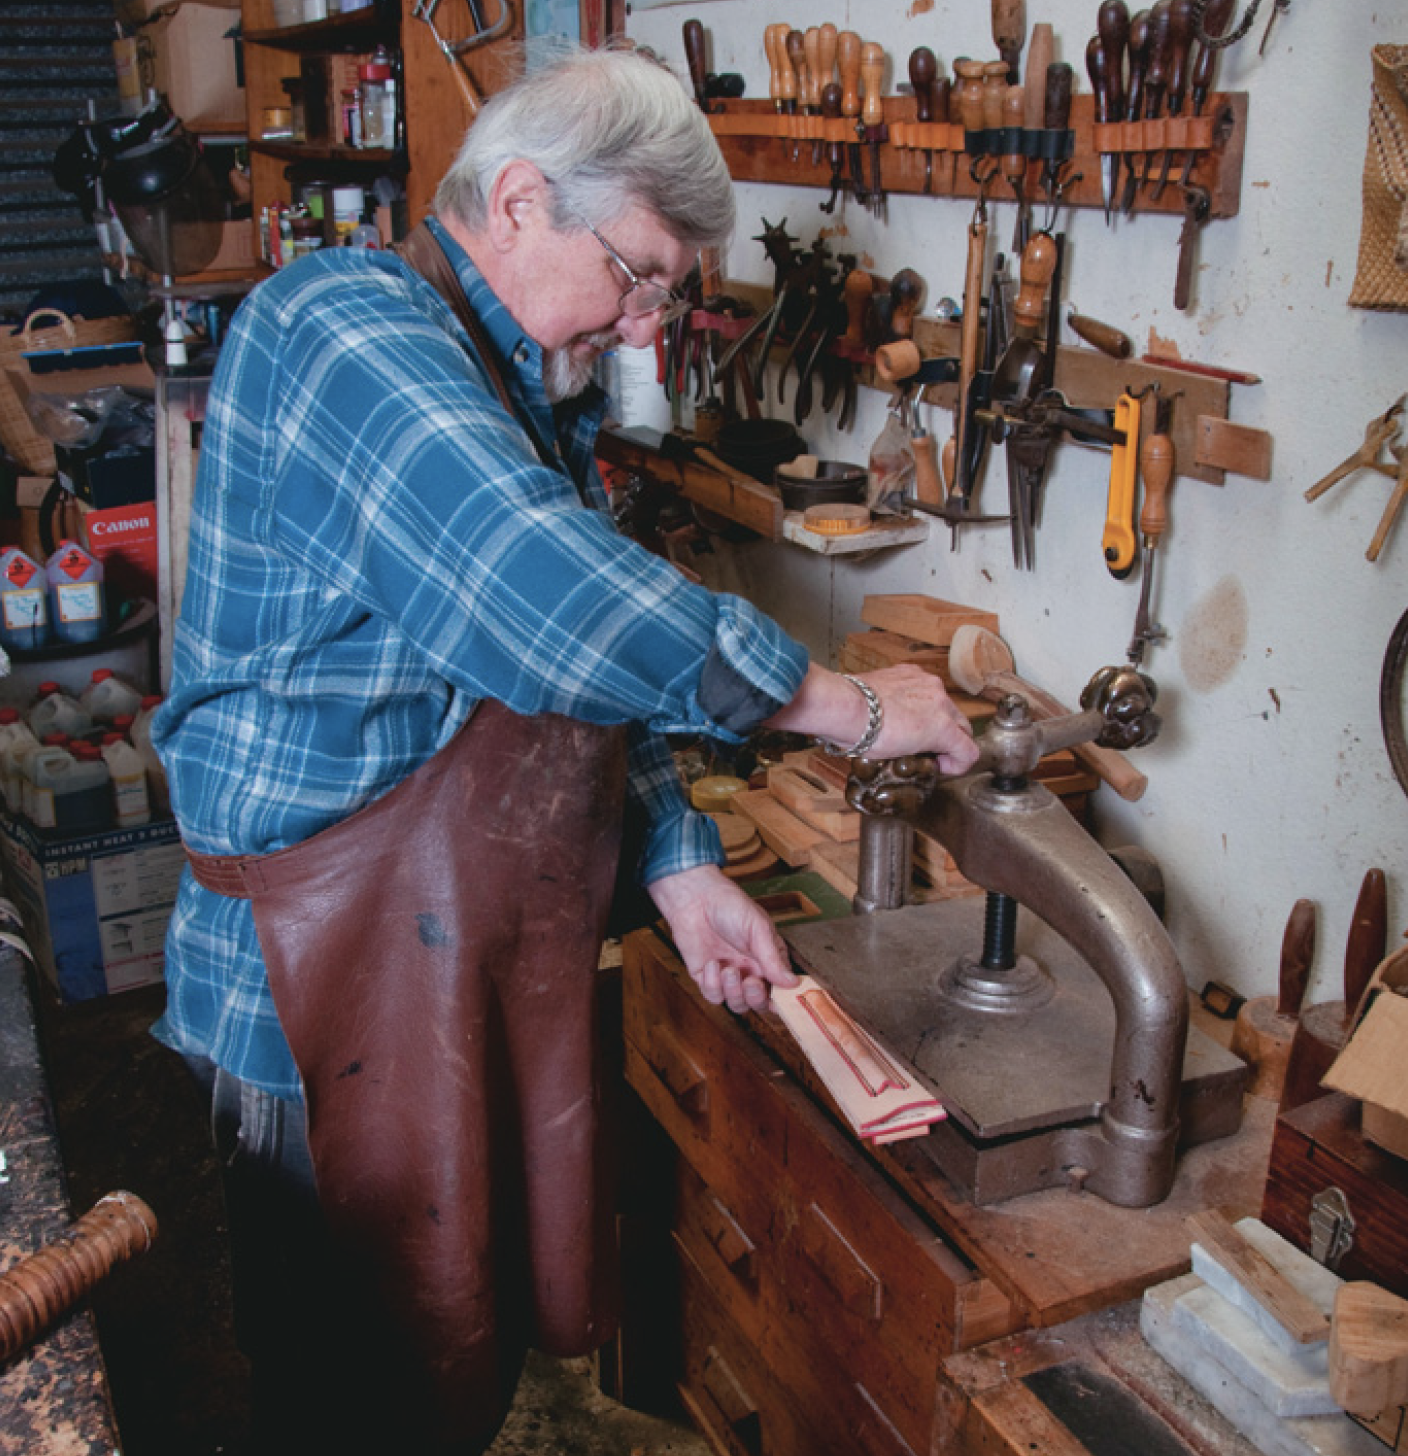
Pressing the seam.
Thread, stitching
These pieces can now be sewn together. I use a waxed, braided polyester thread which is not only very strong and weather-resistant, it is far more user-friendly than the twisted linen threads of long ago. The best measure of the thread length for a reasonably short stretch and for only two pieces of leather is 3 x the length + 10 cm allowed for the needles. For thicker work, such as the body of the sheath, I use a length that is not cumbersome and not so short that I will have to thread too many needles.
The needles I use for hand-stitching are egg-eyed harness needles. These are dull-pointed so that they will follow the holes created with the awl. Thread two needles and lock the ends by passing the needles through the thread at their respective ends. This will lock the thread in place when it stops at the end of the eye.
Starting in the third hole, work back towards the end, using the last hole with the thread over the end of the leather, then return and work your way down to the bottom.
When you are using one thread with two needles, each needle passes the other and leaves two threads in each hole. A machine-stitch consists of two threads joined with a loop and when these stitches are broken, they will keep unravelling. This is not so with hand-stitching, where each loop has to be cut before the stitches will unravel.
When you reach the bottom with your stitching, back-sew for three holes and cut the thread off from the inside of the sheath. Moisten the piece of leather and follow the same procedure as the other side. Moistening the leather allows it to fold and makes it easier to sew.
Testing knife fit with spacer glued in
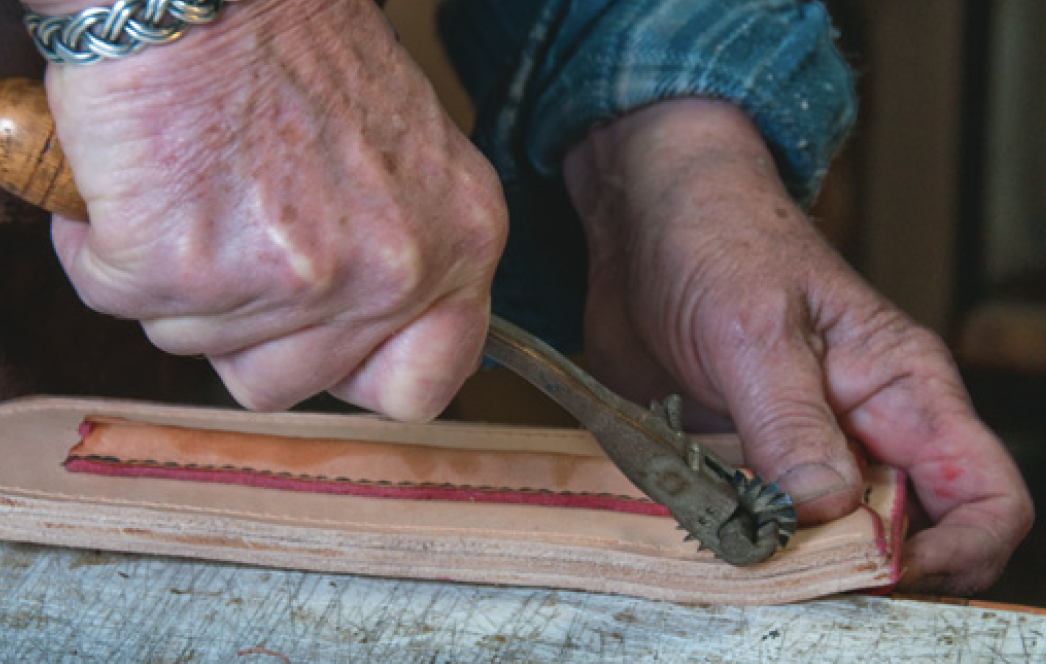
Pricking stitch holes.

Cutting stitch channel with stitch-groover
Stabbing stitch holes.
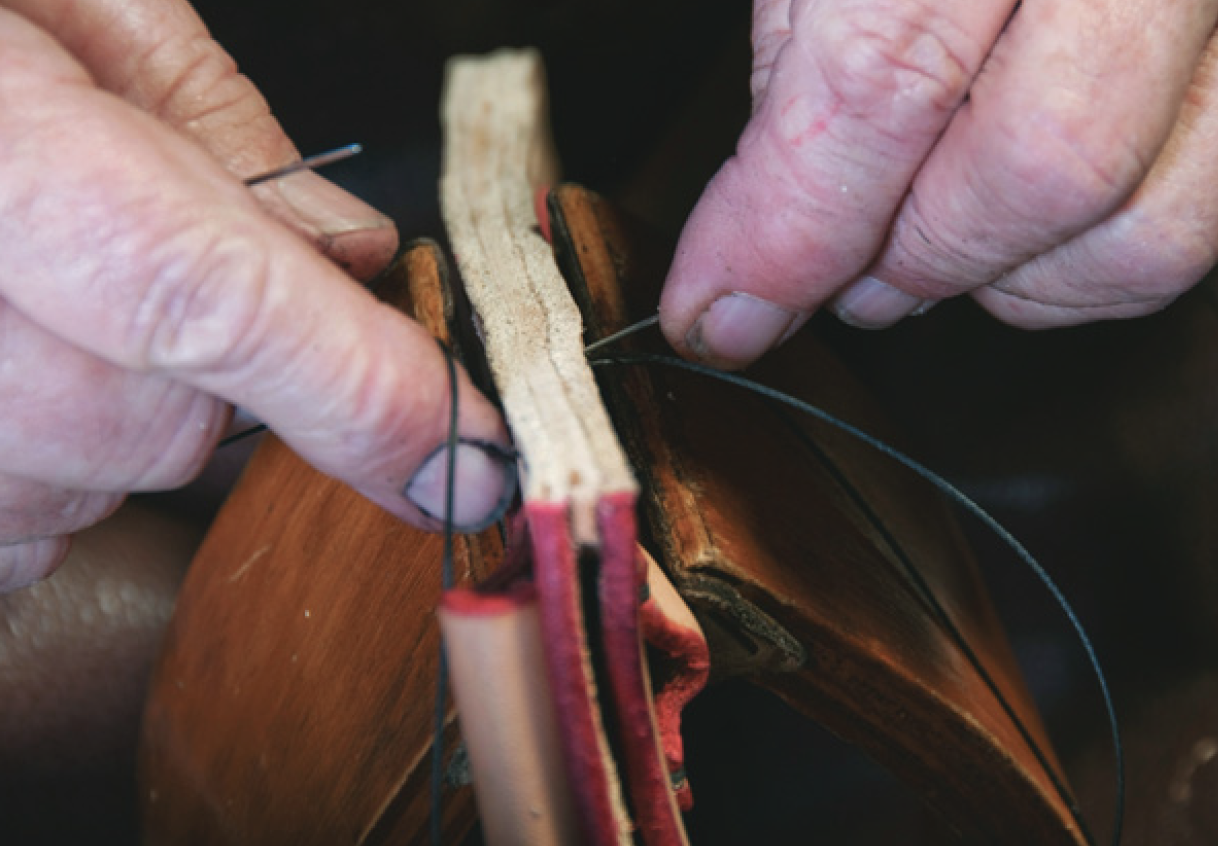
Using two needles to stitch sheath pieces and spacer held in saddler’s vice.
Stretching knife opening.
Soaking sheath.
Belt loop
Next is the belt loop. On the flesh side of the leather, I use the stitch groover and No 5 stitch pricker in a straight line to mark out the stitches which will be used to attach the loop to back of the sheath. On the grain side, I also use the stitch groover at this time and mark the leather in readiness for stabbing the holes.
Place the loop flesh-side up 25 mm from the top, stab the stitch holes in it and attach it to the back, back-stitching on the ends and trimming the thread on the loop side. Dampen the leather so that it will fold over easily onto the body of the sheath. Once again, stab the holes and stitch the leather down, finishing off the threads of what will become the inside of the sheath.
No 4 edge beveller trims soft edge.
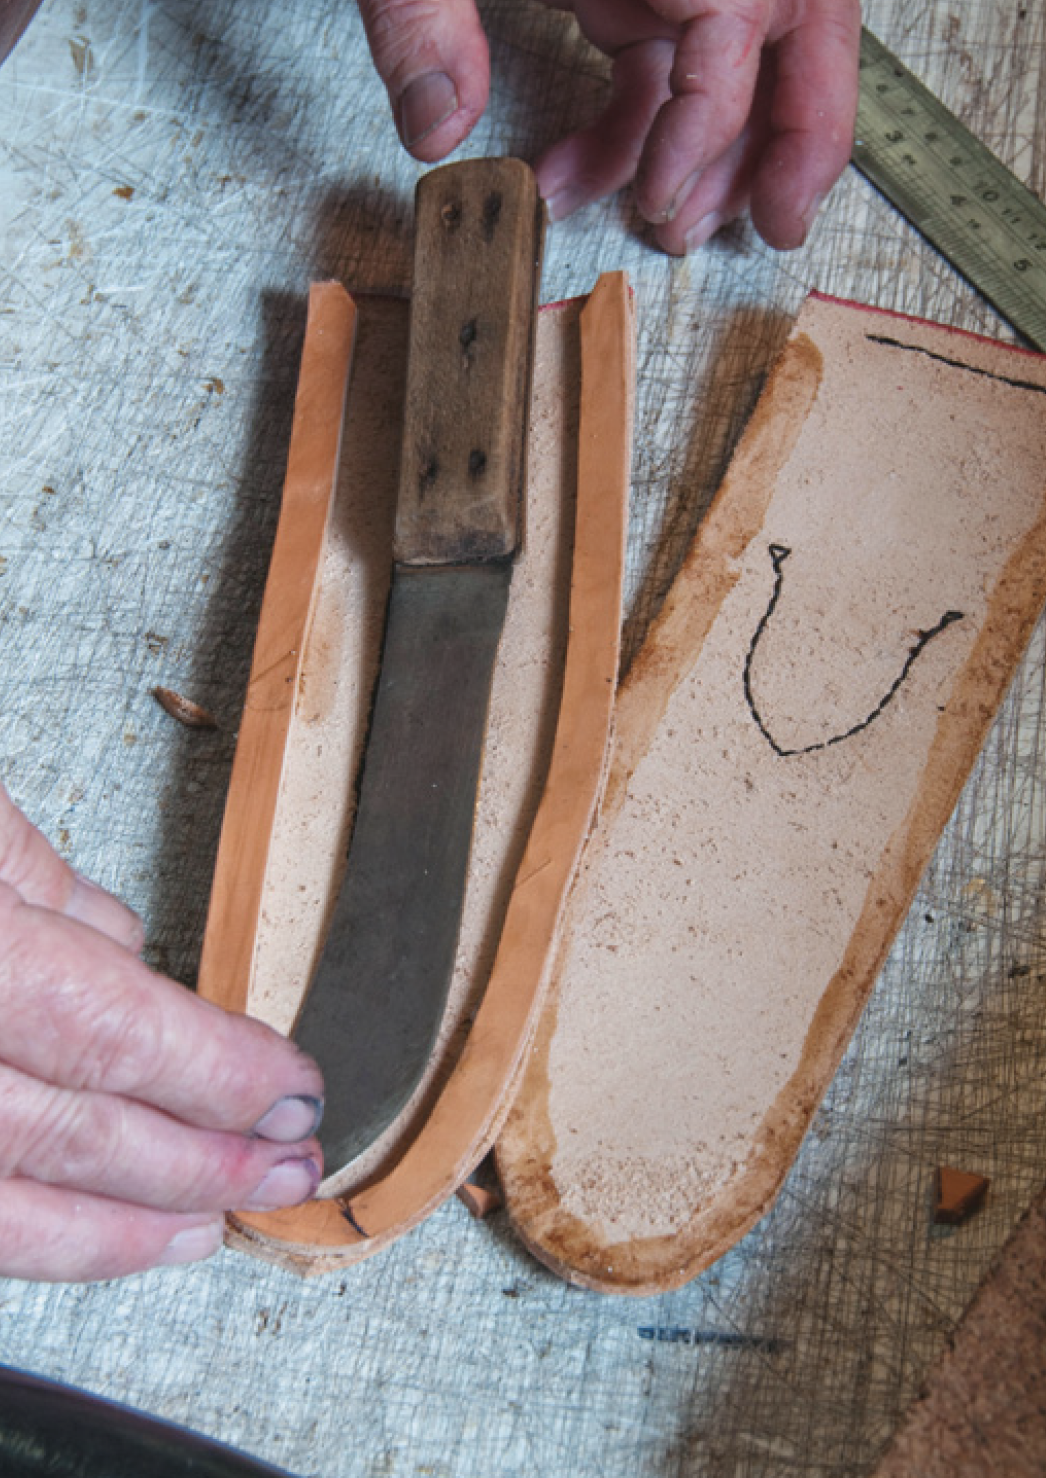
Size test
The next move is to glue the spacer in place between the two pieces, using any good contact glue that’s not thick. Something like F2 is good. When the spacer is glued in place to the front, test that the knife has room and slides in and out easily, or that sheath is not oversized. At this point, you can make minor corrections by moving the spacer before fixing it to the back and pressing it into place. Give the edge a sand to obtain a reasonable smooth-ness. A finishing sanding comes later.
Edge stain.
Stitch holes
Use the No 5 pricking wheel to give the marks for stabbing the stitch holes. As there are now three layers of leather to stab through, about 10 mm thick, I use a pot of saddle soap to stab the awl into the leather as I go. This not only lubricates the awl but also assists with the needles when you are sewing. Another technique is to get your shoulder above the awl as you are stabbing the holes, so your weight drives the awl straight without your wrist wavering.
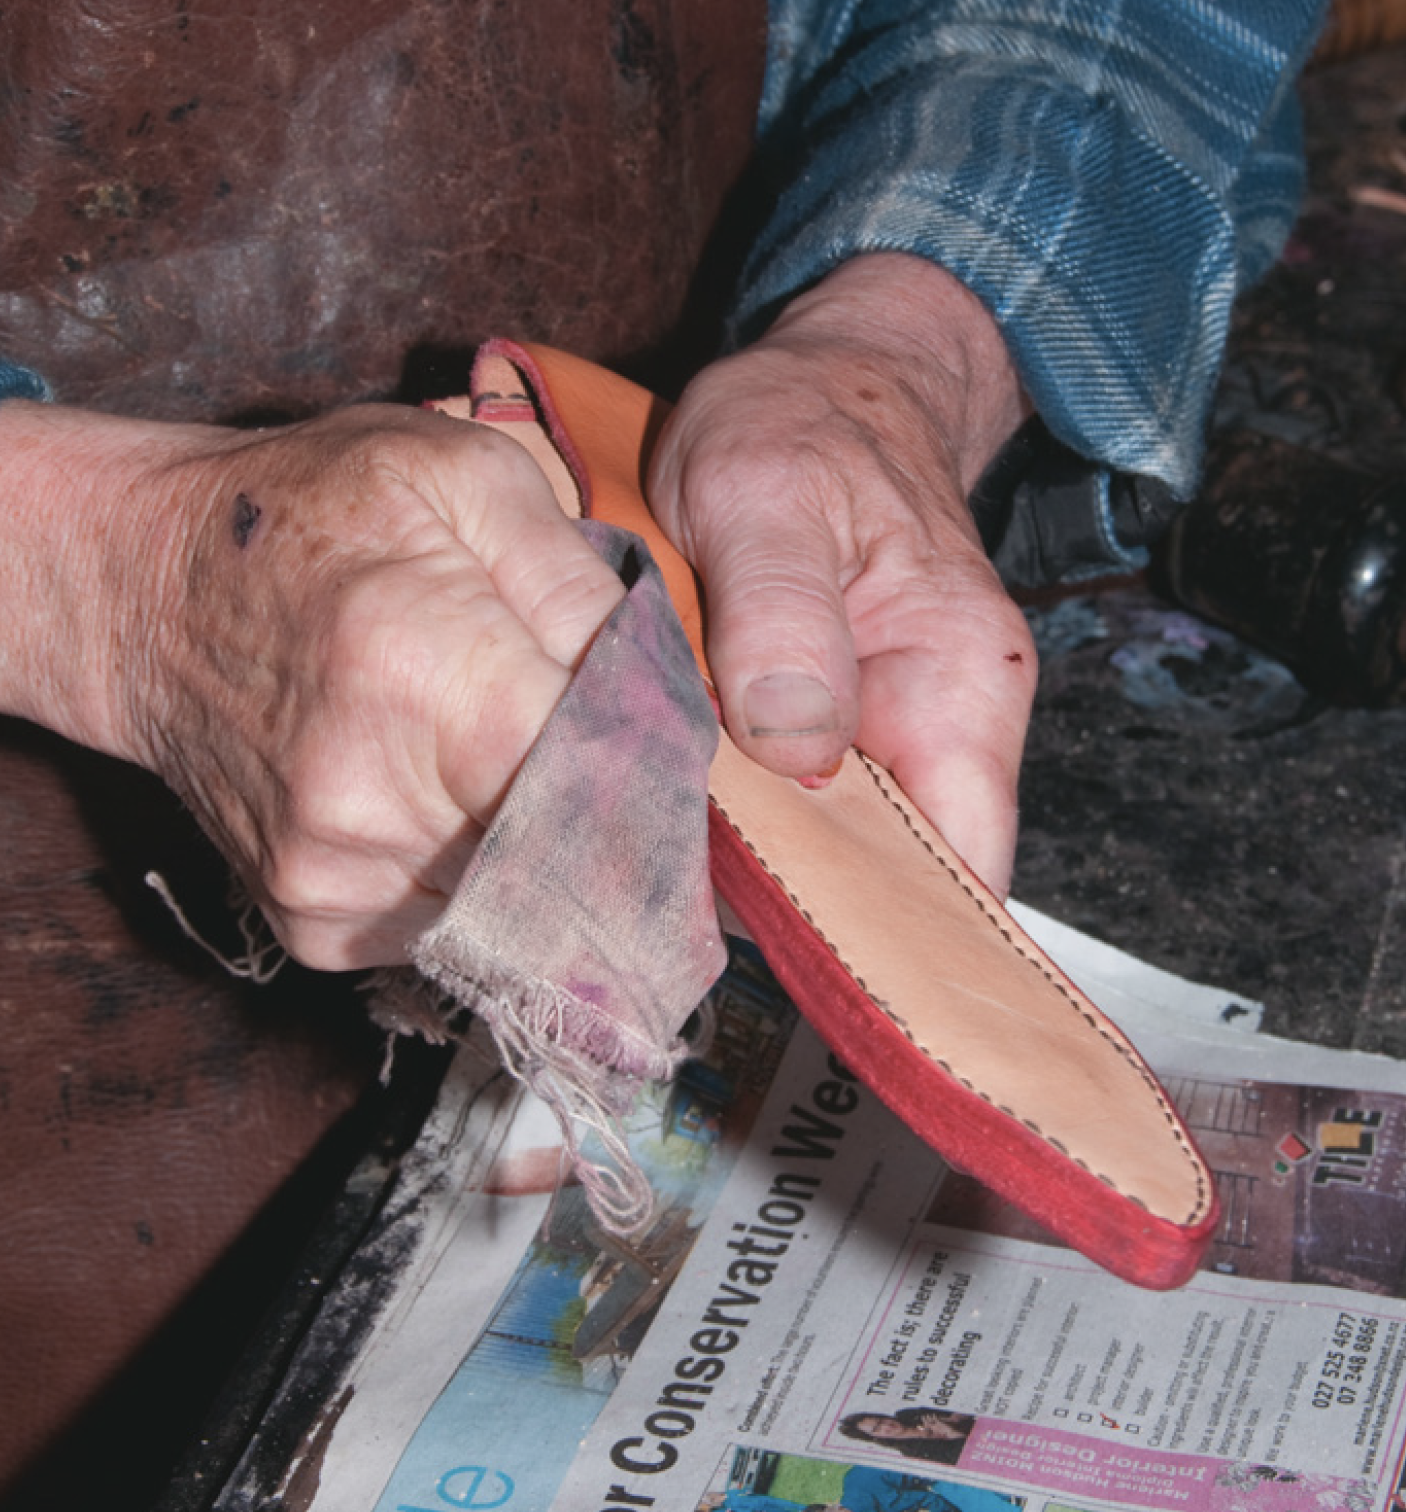
Burnishing the edge.
Sewing
Starting needles in the third hole from the top, fill in the top two holes and then reverse sew and work your way around sheath in this manner. This gives four threads in each of three holes. I have never advocated rivets in hunting gear. Not only are they un-necessary but they tend to be a cause of the leather breaking down. When the length of thread comes to its end, back stitch one needle and end the threads on the back of the sheath. Start the new thread once again at the top. I find that most sheaths take three lengths of thread.
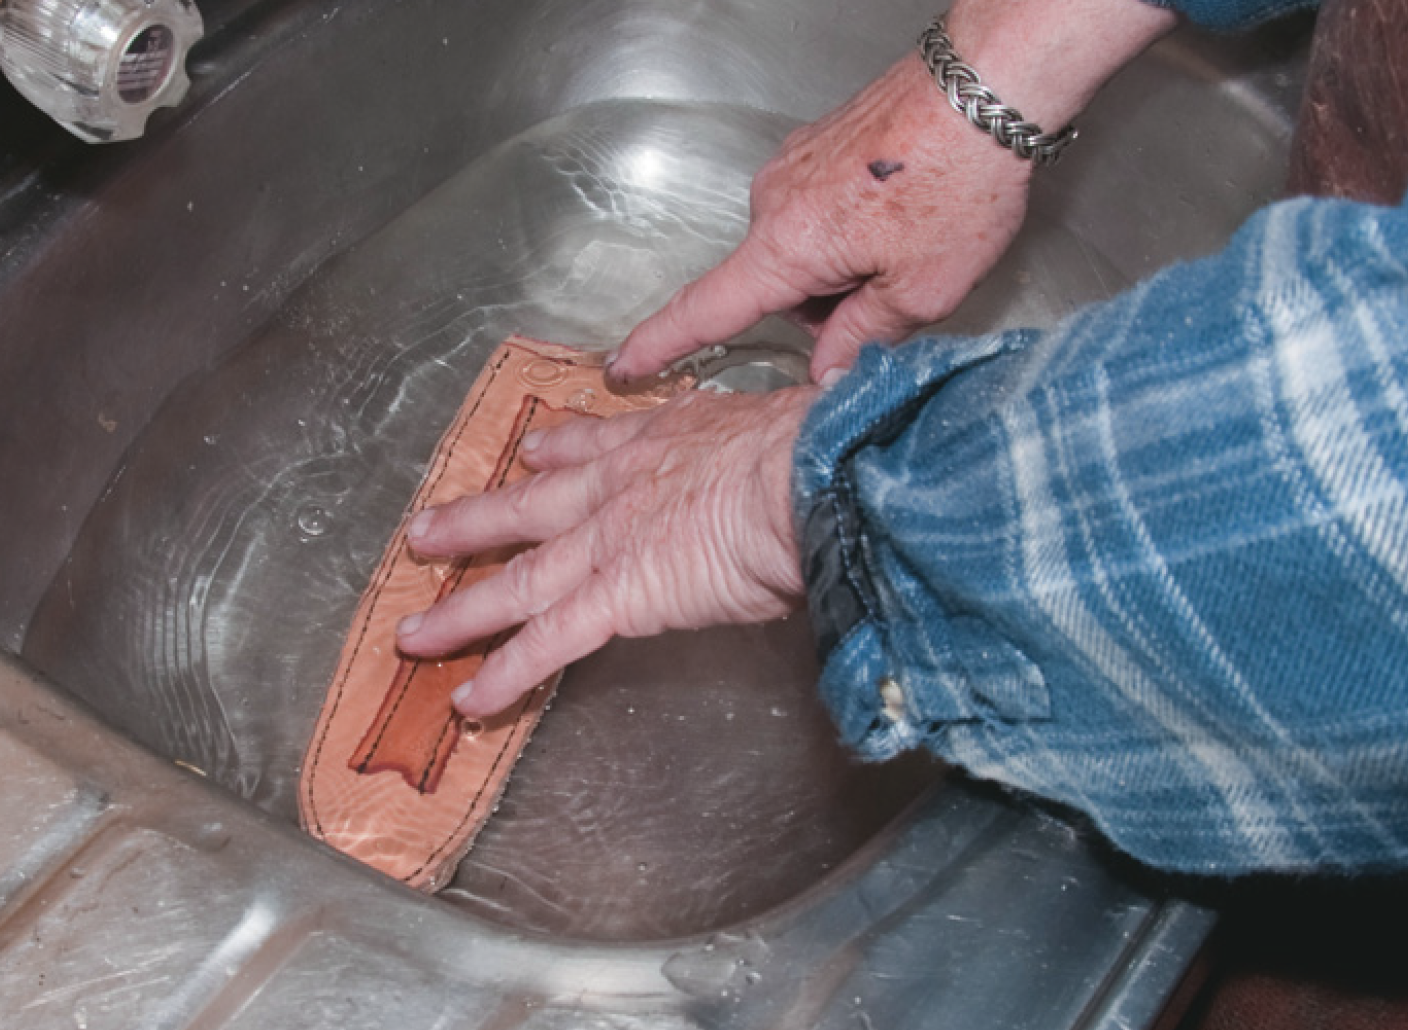
Soak
Once the stitching has been completed, the next task is to soak the sheath in hot water. The water should be around hand temperature. The purpose of this immersion in hot water rather than in cold is so that the corium, the middle part between the grain and the flesh, will shrink, thereby firming up the leather.
This is the point at which you can shape the leather to what is needed. It is the reason why vegetable-tanned leather is used; it is natural, can be manipulated and will hold a shape that is introduced to it.
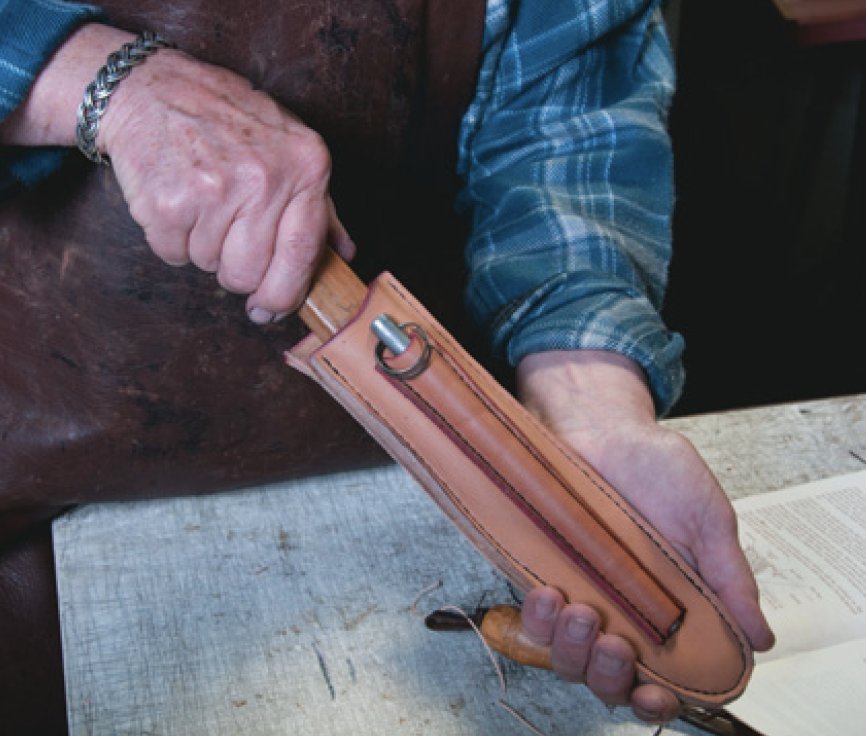
With this in mind, one has to force the sharpening steel into its sleeve and push a block of wood that is similar in size to knife handle into the sheath. Allow the leather to air-dry. In the sun is OK. When the outside of the sheath appears dry, take out mock handle and let the leather shrink back a little. Leave the steel in until it is dry. This usually takes 24 hours, depending on the climate.
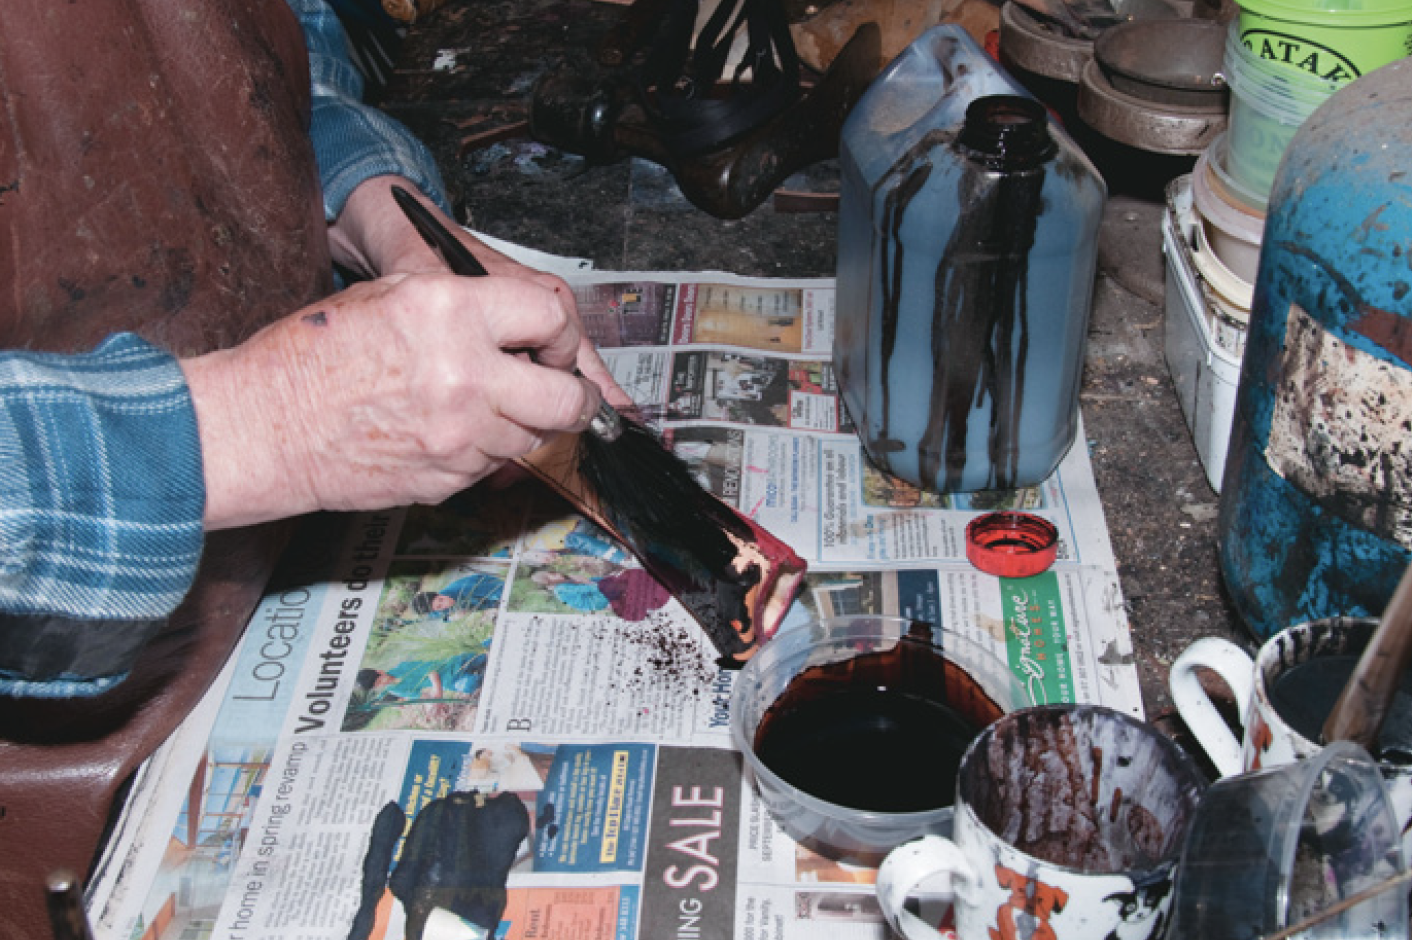
Dyeing sheath black.
Sanding, buffing
Once the sheath is dry, the edges can be sanded back to a smooth finish. When pieces of leather are laminated together, they have a characteristic that is similar to wood, albeit softer, and it is okay to use the same approach with a linisher or belt sander to assist in sanding. When the leather is smooth, use a No 4 edge beveller to trim the softer edges before applying edge ink and burnishing the leather to a gloss finish. Now use a spirit-based stain to colour the sheath. When it is dry, buff it with a dry cloth to remove any “bloom” (excess stain dries as powder).
The last but vital step is to use a buffing machine to impregnate wax into the leather. I use two sewn cloth buffs. On the first one, I use what is known as bruising wax. This is a compound of beeswax and another harder wax. The harder wax blended in takes away the stickiness of beeswax and becomes the carrier to penetrate the leather. The second sewn cloth buff I use is carnauba wax, which is a very hard polishing wax. The use of these waxes takes away the necessity to be always oiling the leather. The outside of the sheath will be waterproof for many years.
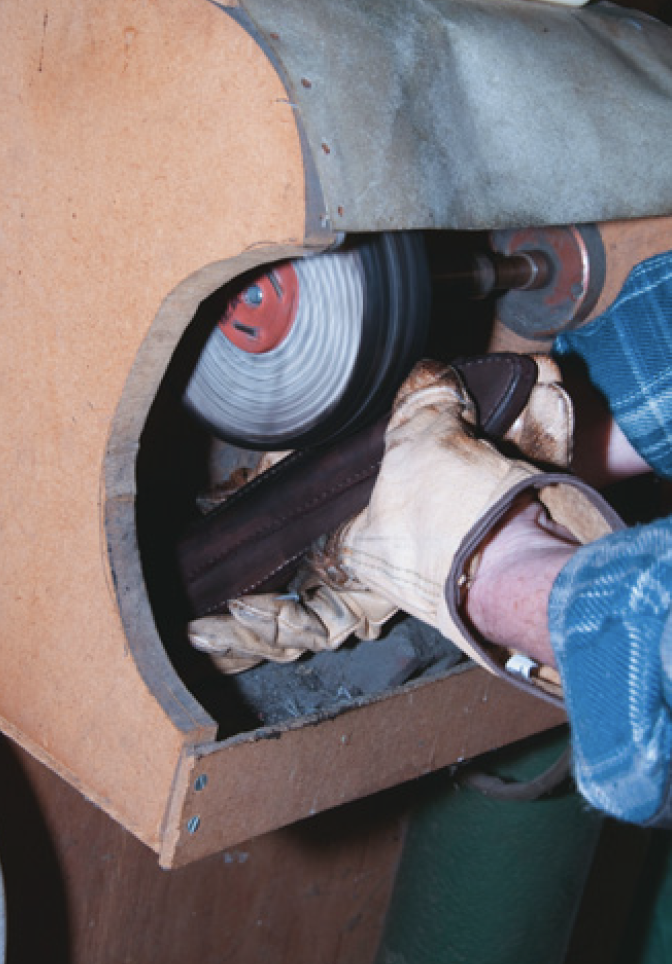
Impregnating leather with wax
Vegetable tanning
While you can make a knife sheath from any type of heavy leather, vegetable tanned leather, or russet as it is commonly known, will make the best sheath. Most leather for clothing and upholstery is chemically tanned by the chrome method whereas vegetable tanned leather is tanned with oak and various other species of tree barks that tanners have found to be suitable in producing good leathers. The difference is chrome leathers have been coloured and produced for specific purposes, whereas bark tanned leather is like a good piece of wood that has not been clogged up with paint etc and is still “living.” Therefore it can be cleaned and polished to give many years of satisfaction to the owner. This is russet.
The difference, as a general rule of thumb, is found by looking at the side-grain of the leather to see what colour the corium (grain) is. If it’s grey it’s probably chrome; a fawn colour signifies bark tanning.
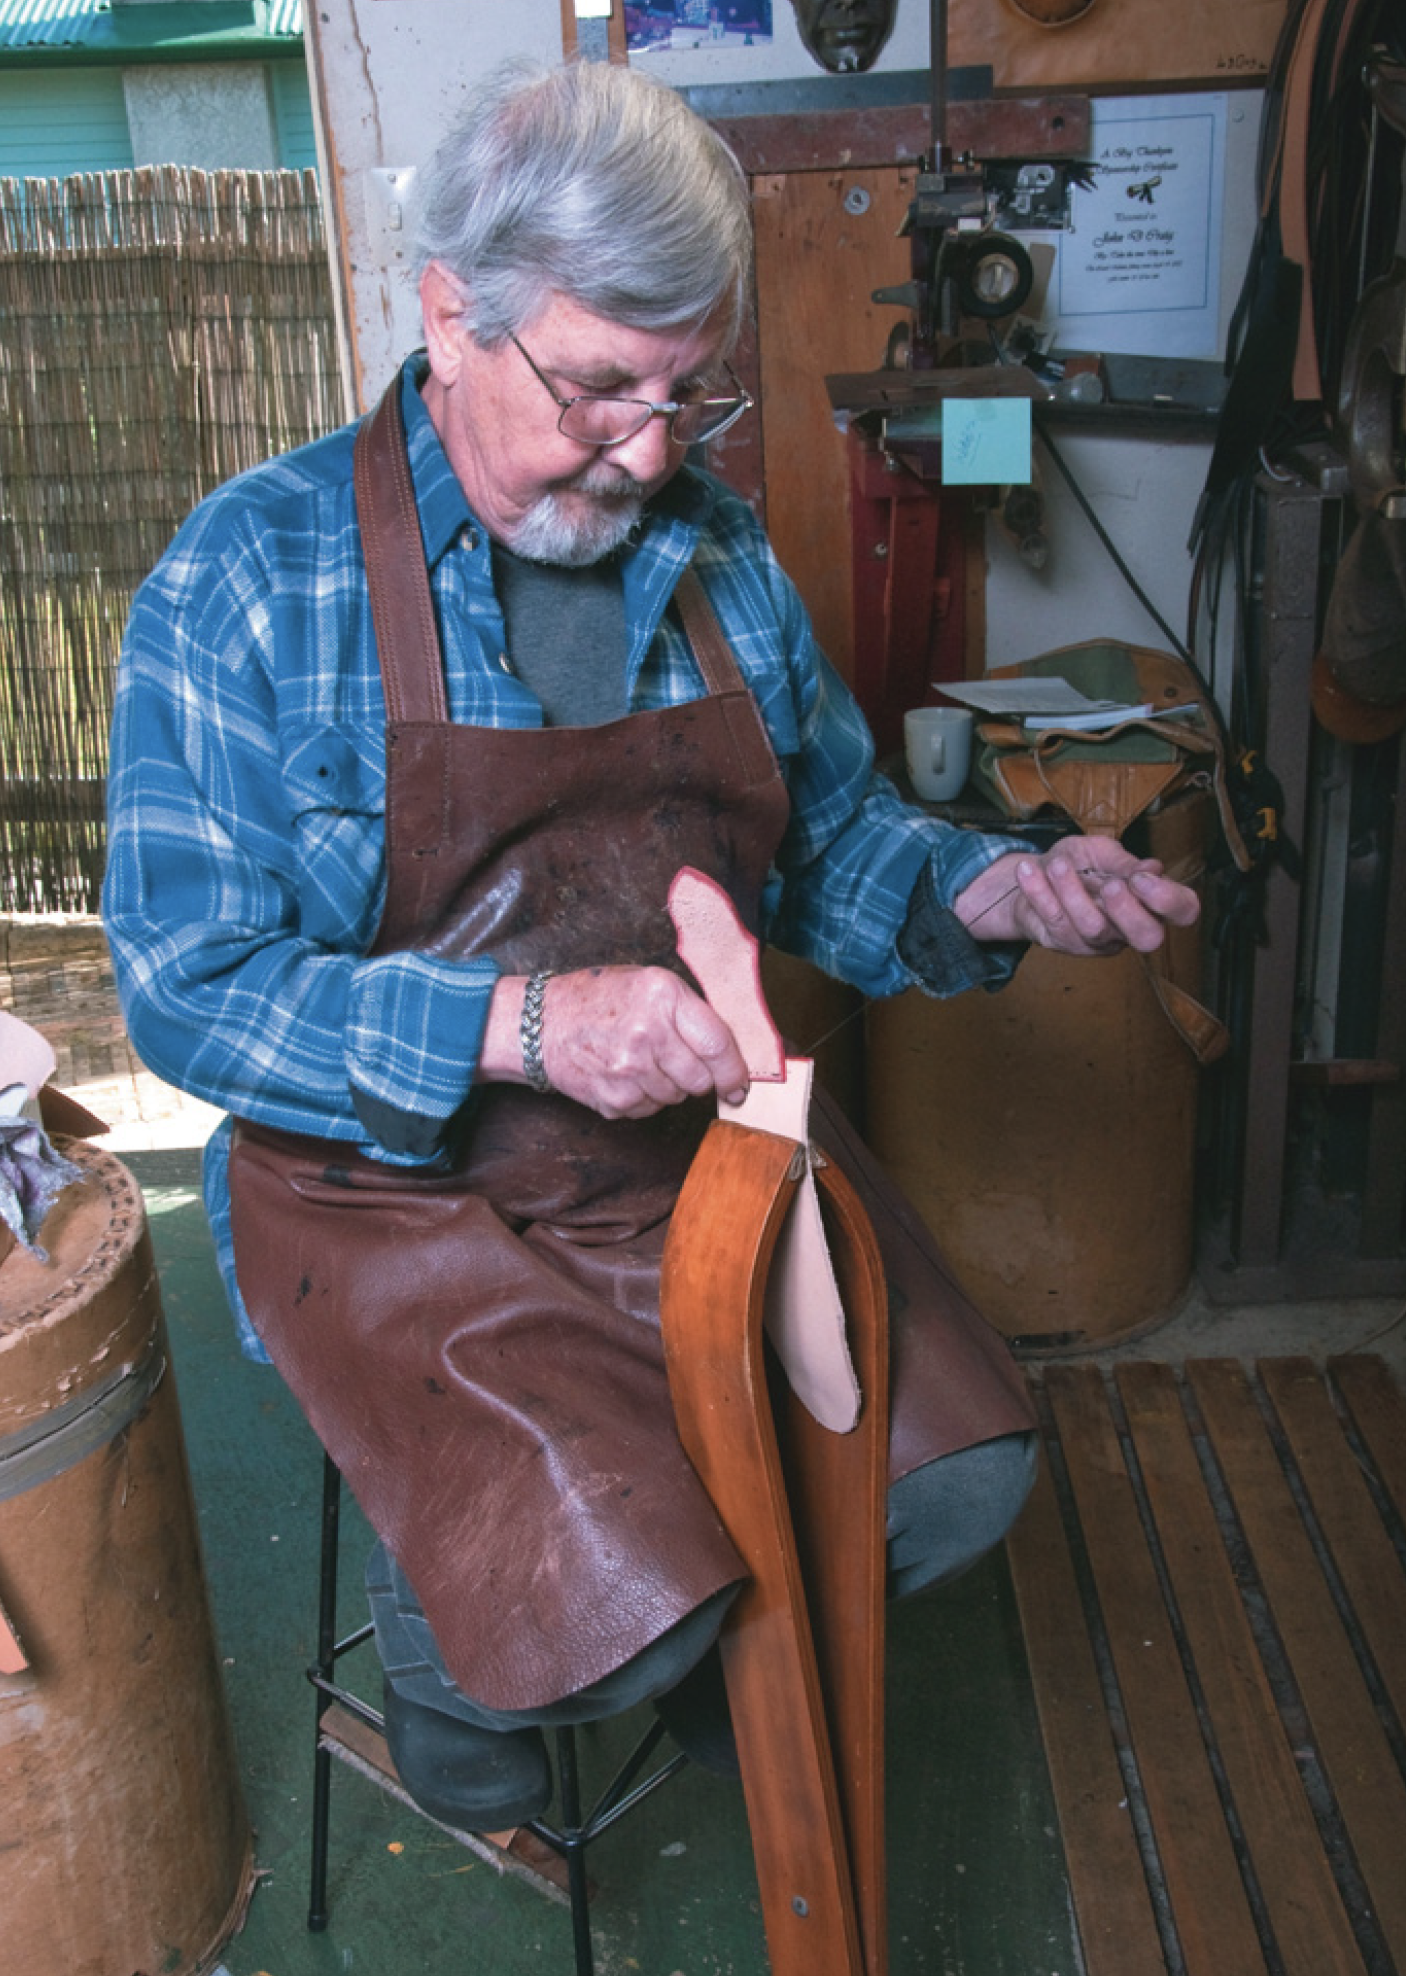
John Craig using saddler’s vice