How to make a cubby — and transport it to Christchurch
By Hugh McCarroll
My daughter in Christchurch emailed that she would like a cubby house for her three young children. They had recently moved into their new house and there was a 1.5 x 5 metre garden strip adjacent to the fence in the back yard. I had read Rod Kane’s excellent article in the August/ September 2013 issue of The Shed on building a playhouse and thought at the time what a fun project that would be, so the planets were in alignment.
After several versions we came up with a design that suited the location and would provide plenty of potential for activity as my grandchildren grow. I planned to build the cubby in Hamilton and transport it to Christchurch in my motorhome. That meant the cubby had to be demountable and the wall panels and timber lengths had to be able to t through the side door of the motor- home and into the luton space above the cab. I judged that panels up to 1.5 metres square and timber lengths about 3 metres would fit.
I wanted to make the cubby waterproof with a galvanised steel roof. Galv comes in 1220 mm wide sheets, so allowing for a 25 mm fold on each edge suggested a maximum width of 1170 mm for the cubby. I decided on dimensions of 1170 mm deep, 1400 mm long and 1450 mm high. This ts the transportation criteria and is big enough for the kids to have a good play space. The fact it is weatherproof might be a blessing for a mum with whingeing kids on a wet day. I also wanted it to last, so I used construction-grade ply and treated timber with galvanised and/or stainless steel fixings for the construction.
I also wanted to incorporate a climbing wall, a slide and a reman’s pole into the design, with a deck above the cubby and a hatch to allow the kids to climb onto the deck from inside. The hatch adds complexity, but it also adds a lot of fun and adventure. The logical size for the climbing wall is 2400 mm high by 1200 mm wide, the size of a sheet of plywood. Setting the deck at 1600 mm high would clear the cubby and allow 800 mm high sides. The climbing wall would form one end of the cubby, with the slide and reman’s pole at the other end. I used SketchUp for the design. It is a free 3D modelling package that is easy to use.
Slide
There is an industry out there supplying playground equipment and fittings and the major hardware chains carry a limited selection of suitable stuff. The hardware chains and most websites I looked at offered plastic slides 1.2 metres high, but I found one that was 1.7 metres. The slide is just over 3 metres long and I had to pick it up from Dare 2 Play in Silverdale, north of Auckland. I transported it to Hamilton on the roof of my car and planned to lash it to the roof of the motor home to get it to Christchurch. While picking it up I found the supplier had a whole lot of other neat stuff, such as climbing lugs, a pirate ship wheel and a telescope, which I also bought for the project.
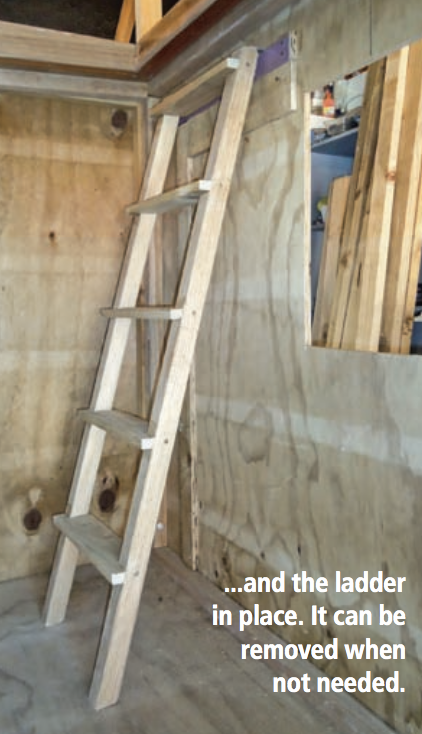
Building the cubby in my garage I had the added complication of restricted headroom. The garage has a loft over the car parking space, making the headroom just under 2 metres. There is only a narrow space at the back of the garage where full height is available. I could erect the vertical timbers at the climbing wall end, but not at the slide end. It turned out not to be a signi cant issue, as the upper deck could be set up and the hatch installed and opened in the available space. The only things I couldn’t install during the pre-build were the handrails and pickets. I did have to add two shorter vertical timbers at the door end of the cubby to support the upper deck frame during preassembly.
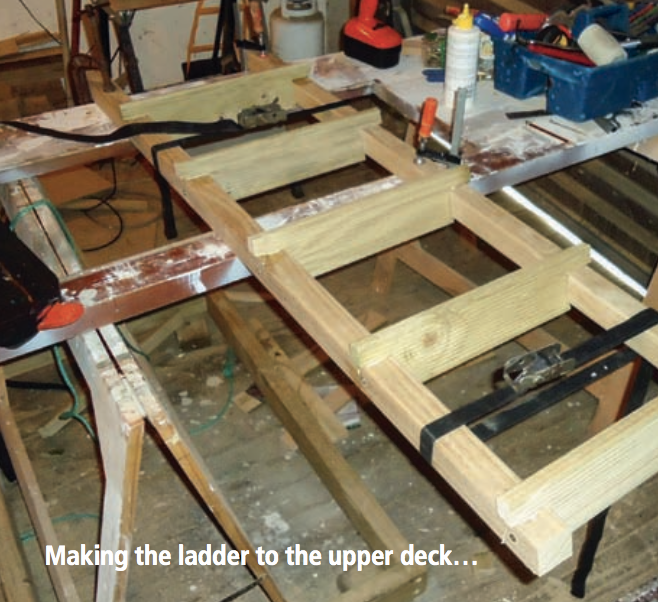
The frame
The first task was to cut all the 90 x 45 mm framing timbers to length using my drop saw. The base consists of two main beams 2800 mm long and six cross members 1020 mm long. The verticals have a rebate cut in the bottom end and sit on the main beams making the overall width of the structure 1200 mm exactly. The base frame is held together with 75 long galv coach bolts recessed so there are no protruding ends. I set three cross members 10 mm above the main beams so that the 15 mm-thick ply floor of the cubby would be flush with the 25 mm-thick decking on the rest of the base.
The next task was to cut the ply panels. The cubby floor is a single piece, but the front, back, door end and roof are fabricated. I made the front side 1450 mm high and the back 1400 mm so the roof sloped back to shed water. The project required five sheets of 15 mm- thick ply. The ply comes with grooved side edges and a plastic strip that allows a tongue- in-groove alignment of joined panels. The front and back sides and the door end all overlap the floor and the sides also overlap the door end. The roof overlaps them all. The ply is screwed through to 45 x 45 mm timbers along each edge. At the climbing wall end, the front, back and roof butt against the two verticals and a 90 x 45 mm horizontal cross member. The climbing wall panel on the other side of the vertical timbers forms the end of the cubby.
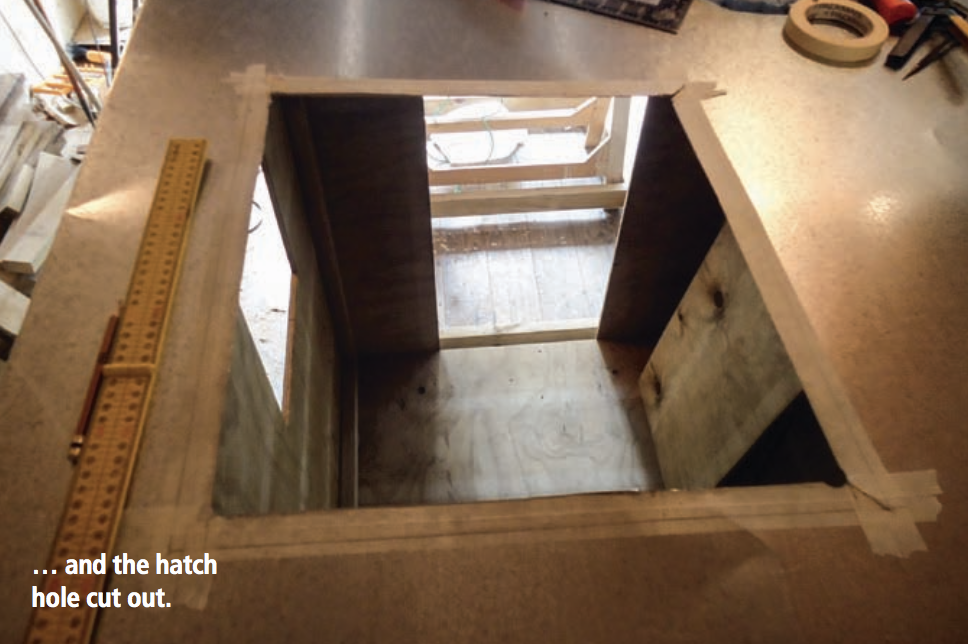
The roof consists of two cut panels 700 x 1170 mm, with the joined edges aligned with the plastic strip. I cut an opening for the hatch 500 x 500 mm in the finished panel, located to suit a hatch cover which would be tted to the deck frame above. The climbing wall is a single piece of ply, but had to be cut in two for transportation. This cut was located so a backing piece of 90 x 45 mm set between the two verticals would provide edge support for the ply.
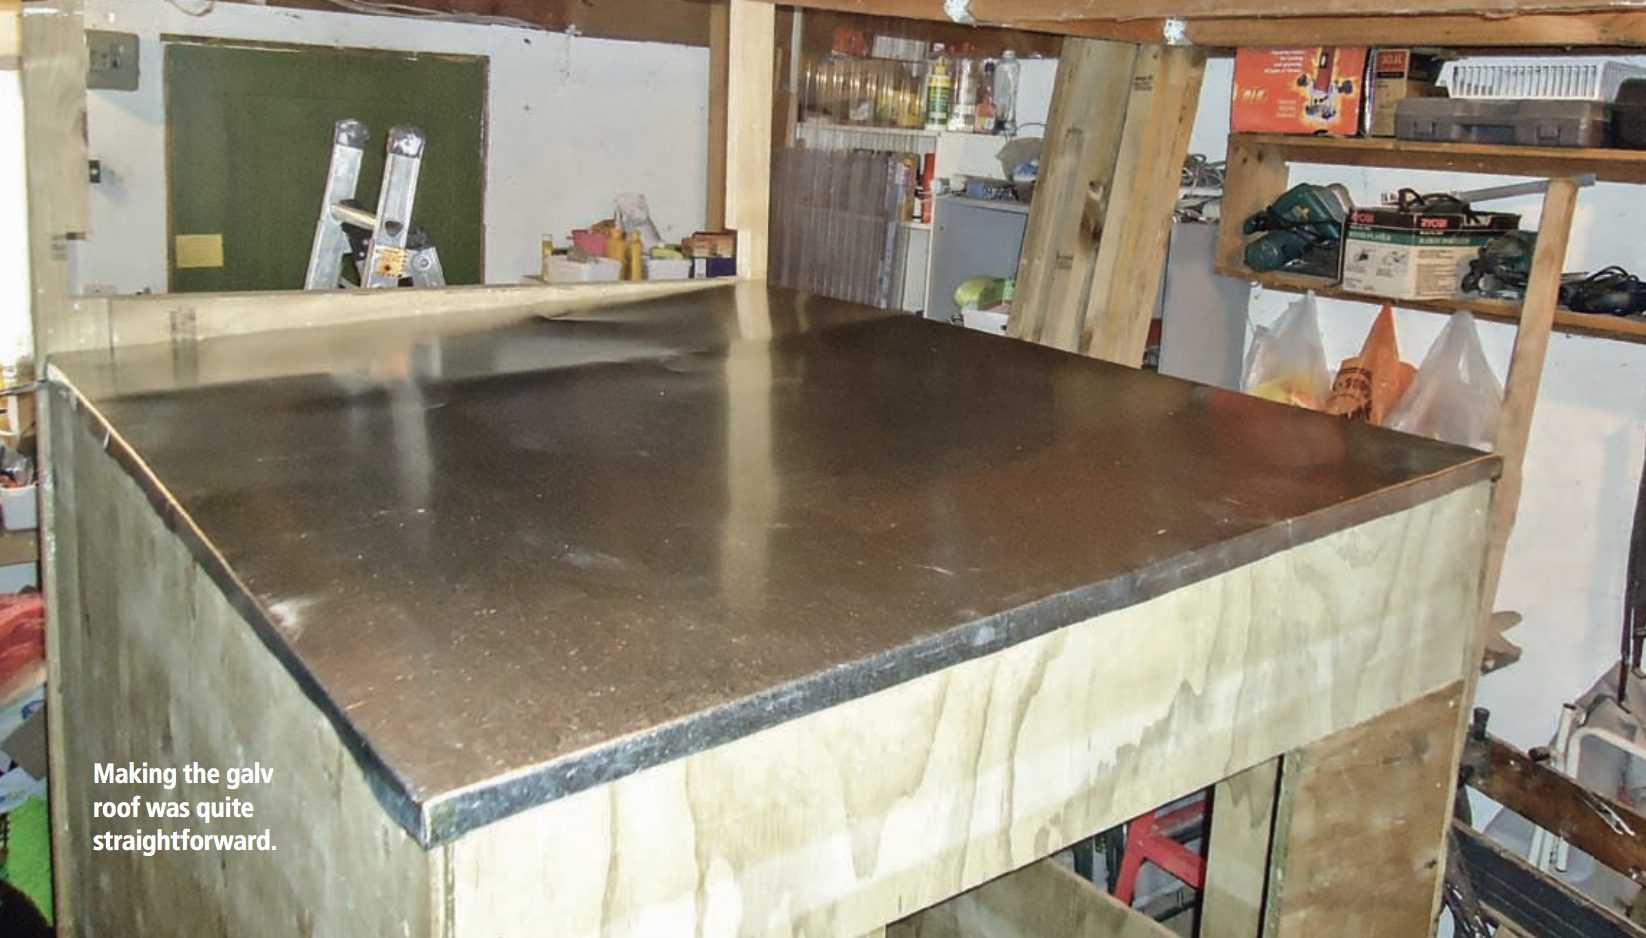
The roof
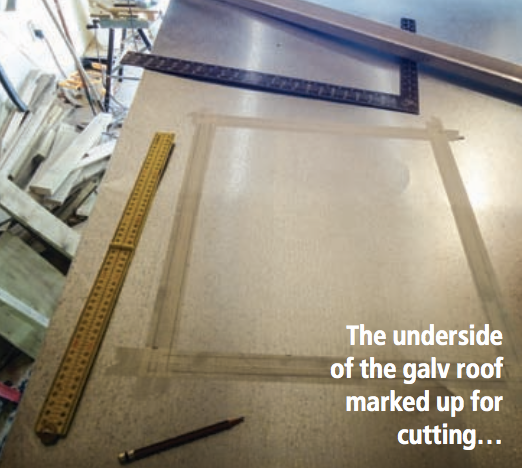
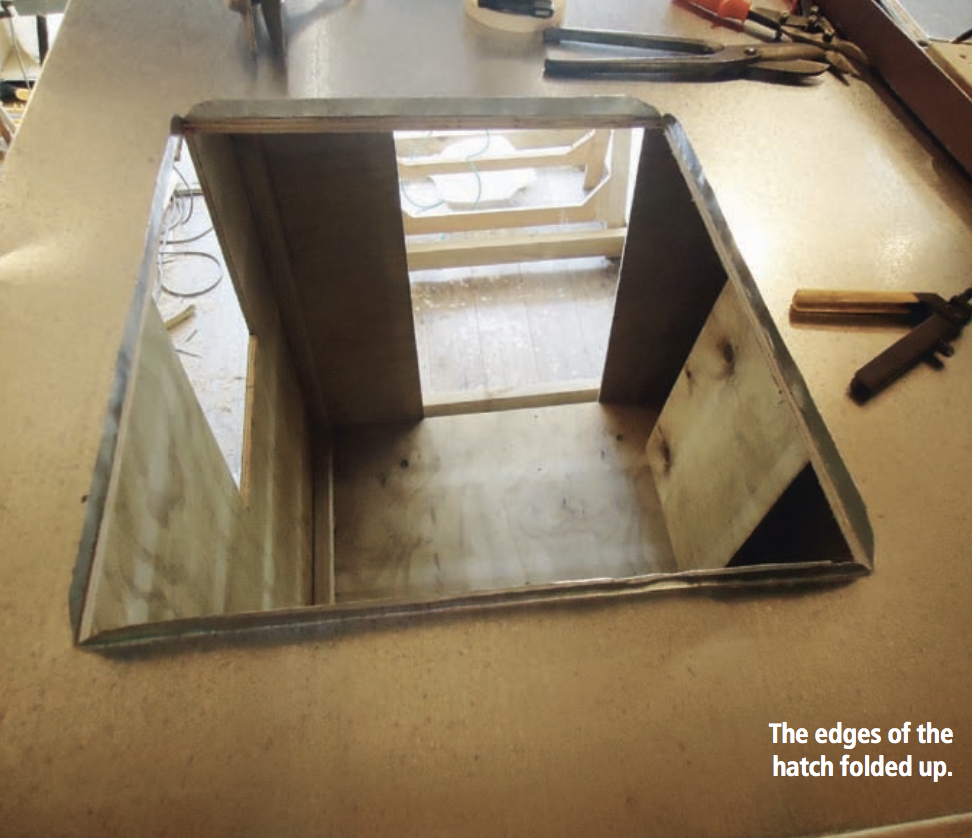
Making the galv roof was quite straightforward. I cut the sheet at 1450 mm long using a guillotine and did all the folding in situ using a hammer and a piece of angle iron clamped to the sheet to form the fold edge. I marked the roof opening on the underside of the galv and carefully removed it and laid it upside down on my worktable. I then cut out a 450 x 450 mm square, leaving a 25 mm edge overlapping the opening. Then I turned the galv over, carefully replaced it on the ply roof, and folded up the edges using the length of angle iron, clamped in position so the galv edge matched the opening in the ply. For the corners I made angle brackets that fitted over the turned up edges and secured these in place with silicone sealant. This provided a dam around the opening so no water from the roof can get into the cubby.
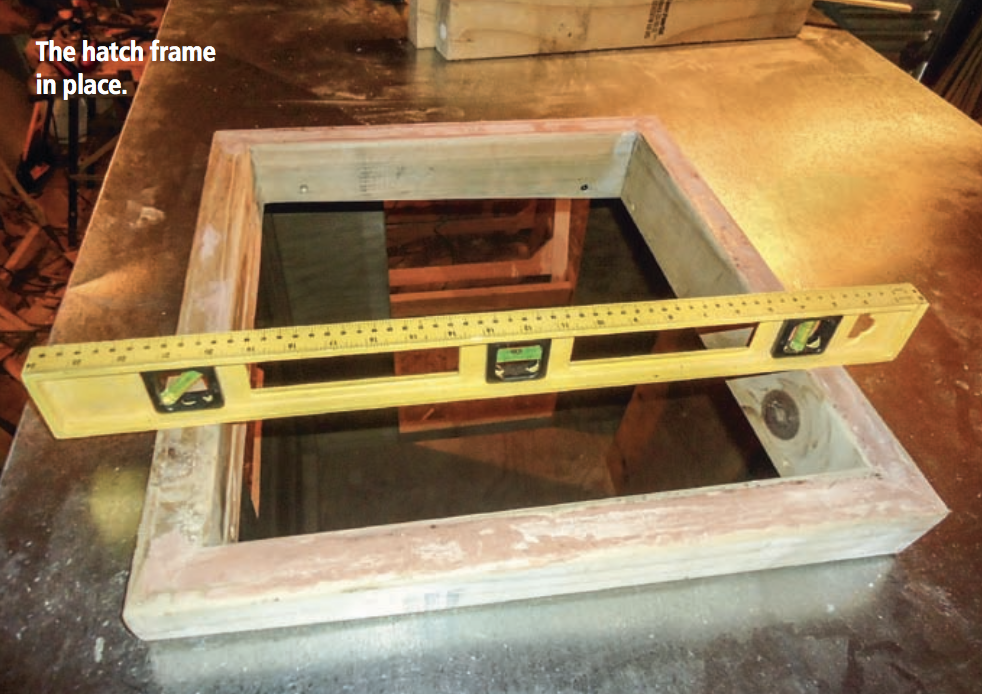
To protect the metal edge I made a wooden frame that turned out to be quite ddly. I wanted the top edge of the frame to be horizontal, but the frame sits on a sloping surface and is deeply recessed. I could have used standard 90 x 18 mm pieces, but had plenty of suitable lengths of 90 x 45 mm offcuts. Neither my bench saw nor my router will cut more than 50-60 mm deep, so I had to cut the pieces into three on the bench saw by cutting from both edges, ending up with three 13 x 90 mm pieces.
I then cut the middle piece leaving a 20 mm wide strip and glued the three pieces back together to form a deep U section. Each of these pieces was then cut to suit the particular edge. The ends were then bevelled 45 degrees like a picture frame and glued and clamped in position. This frame protects the metal edge and provides a handhold/footstep for children climbing through.
Hatch cover
The next job was to install the upper deck frame, which is the same construction as the base, but with only four cross members. Two of the cross members are set 45 mm out from the hatch frame below.
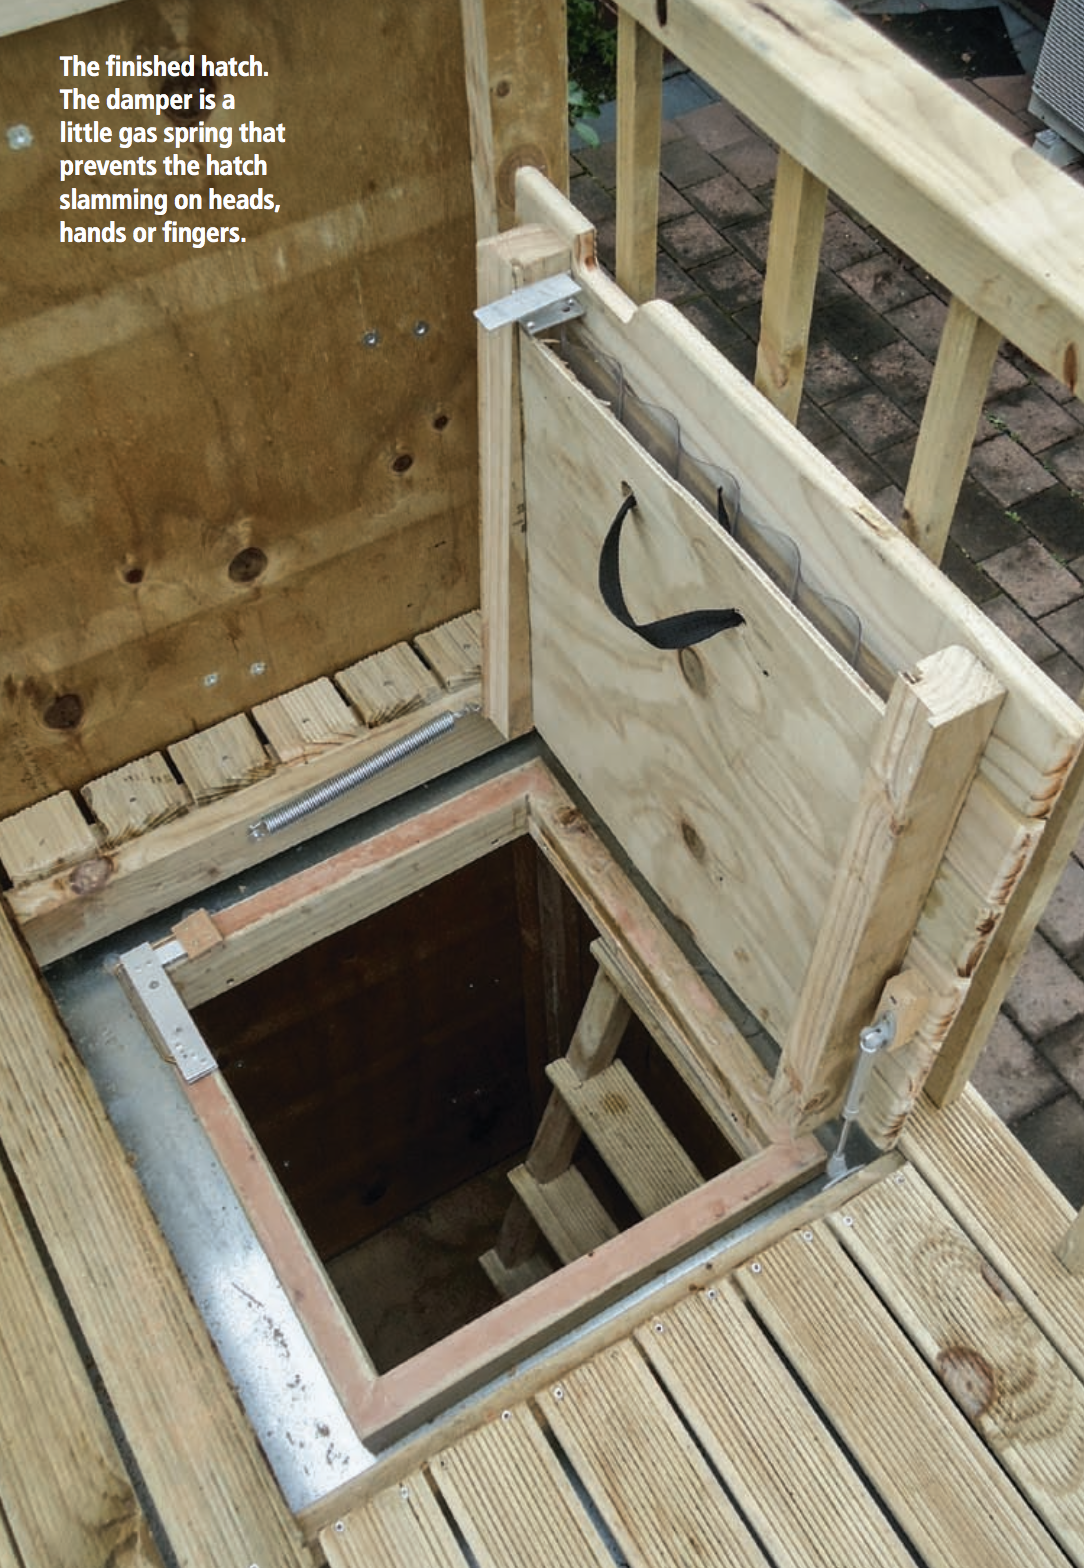
The hatch cover was the most problematic part of the project. It consists of two lengths of 90 x 45 mm cut so the top edge is flush with the top of the deck frame and the bottom edge is 10 mm clear of the hatch below. These were glued and screwed to five lengths of decking above and a piece of 7 mm plywood set into angled grooves on their inside faces. This rigid assembly is hinged to a length of decking screwed to the top deck side beam. The ends of the decking strips are rounded and sit on the cross members. To provide full weather proofing, a piece of corrugated polycarbonate was secured between the decking timbers and the plywood piece during assembly.
The finished hatch weighs about 5 kg, and needs to be constrained so it does not crash down on kiddies’ heads, hands or fingers. I planned to use a tension spring to counteract the weight. This worked okay and I could balance the static weight when the hatch was in the horizontal closed position. Unfortunately this did not prevent the hatch from slamming closed if it was let to fall from the vertical position (the difference between static and dynamic loads). I needed some form of damping to stop the hatch tending to fall. After an unsuccessful trial of a homemade air damper, I left the problem to be sorted out in Christchurch.
On the road
After completing the pre-build as far as I could, I carefully dismantled and loaded the whole lot into the motorhome. It was going to be extremely difficult to support the slide on the roof of the motorhome without damaging the solar panel on one side or the satellite dish on the other. After some consideration of options I noted that the slide was about 20 mm narrower than the clear opening in one of the side windows of the motorhome. After removing the sliding window, I was able to ease the 3.2 metre-long slide into the van and manoeuvre it so it sat mostly in the luton space, overhanging the seating area immediately behind.
I was able to secure it in this position on the far side, away from the entry door side. Then it was an easy job to walk each piece of the disassembled cubby in through the side door and lift it into the luton space. There wasn’t much room left after everything was stowed and I was relieved to have it all aboard. Unloading it in Christchurch was a piece of cake with the ready assistance of my son-in-law David and grandchildren.