A bed for a grandson is a simple exercise
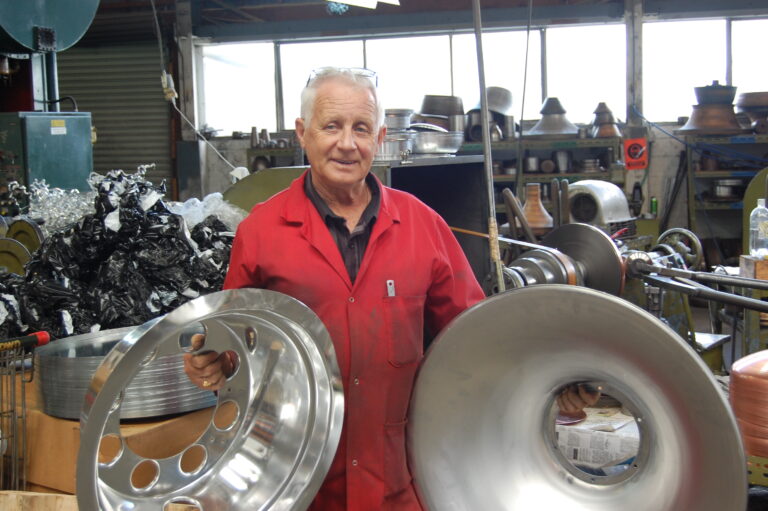
By David Blackwell
Photographs Hayley Nielsen
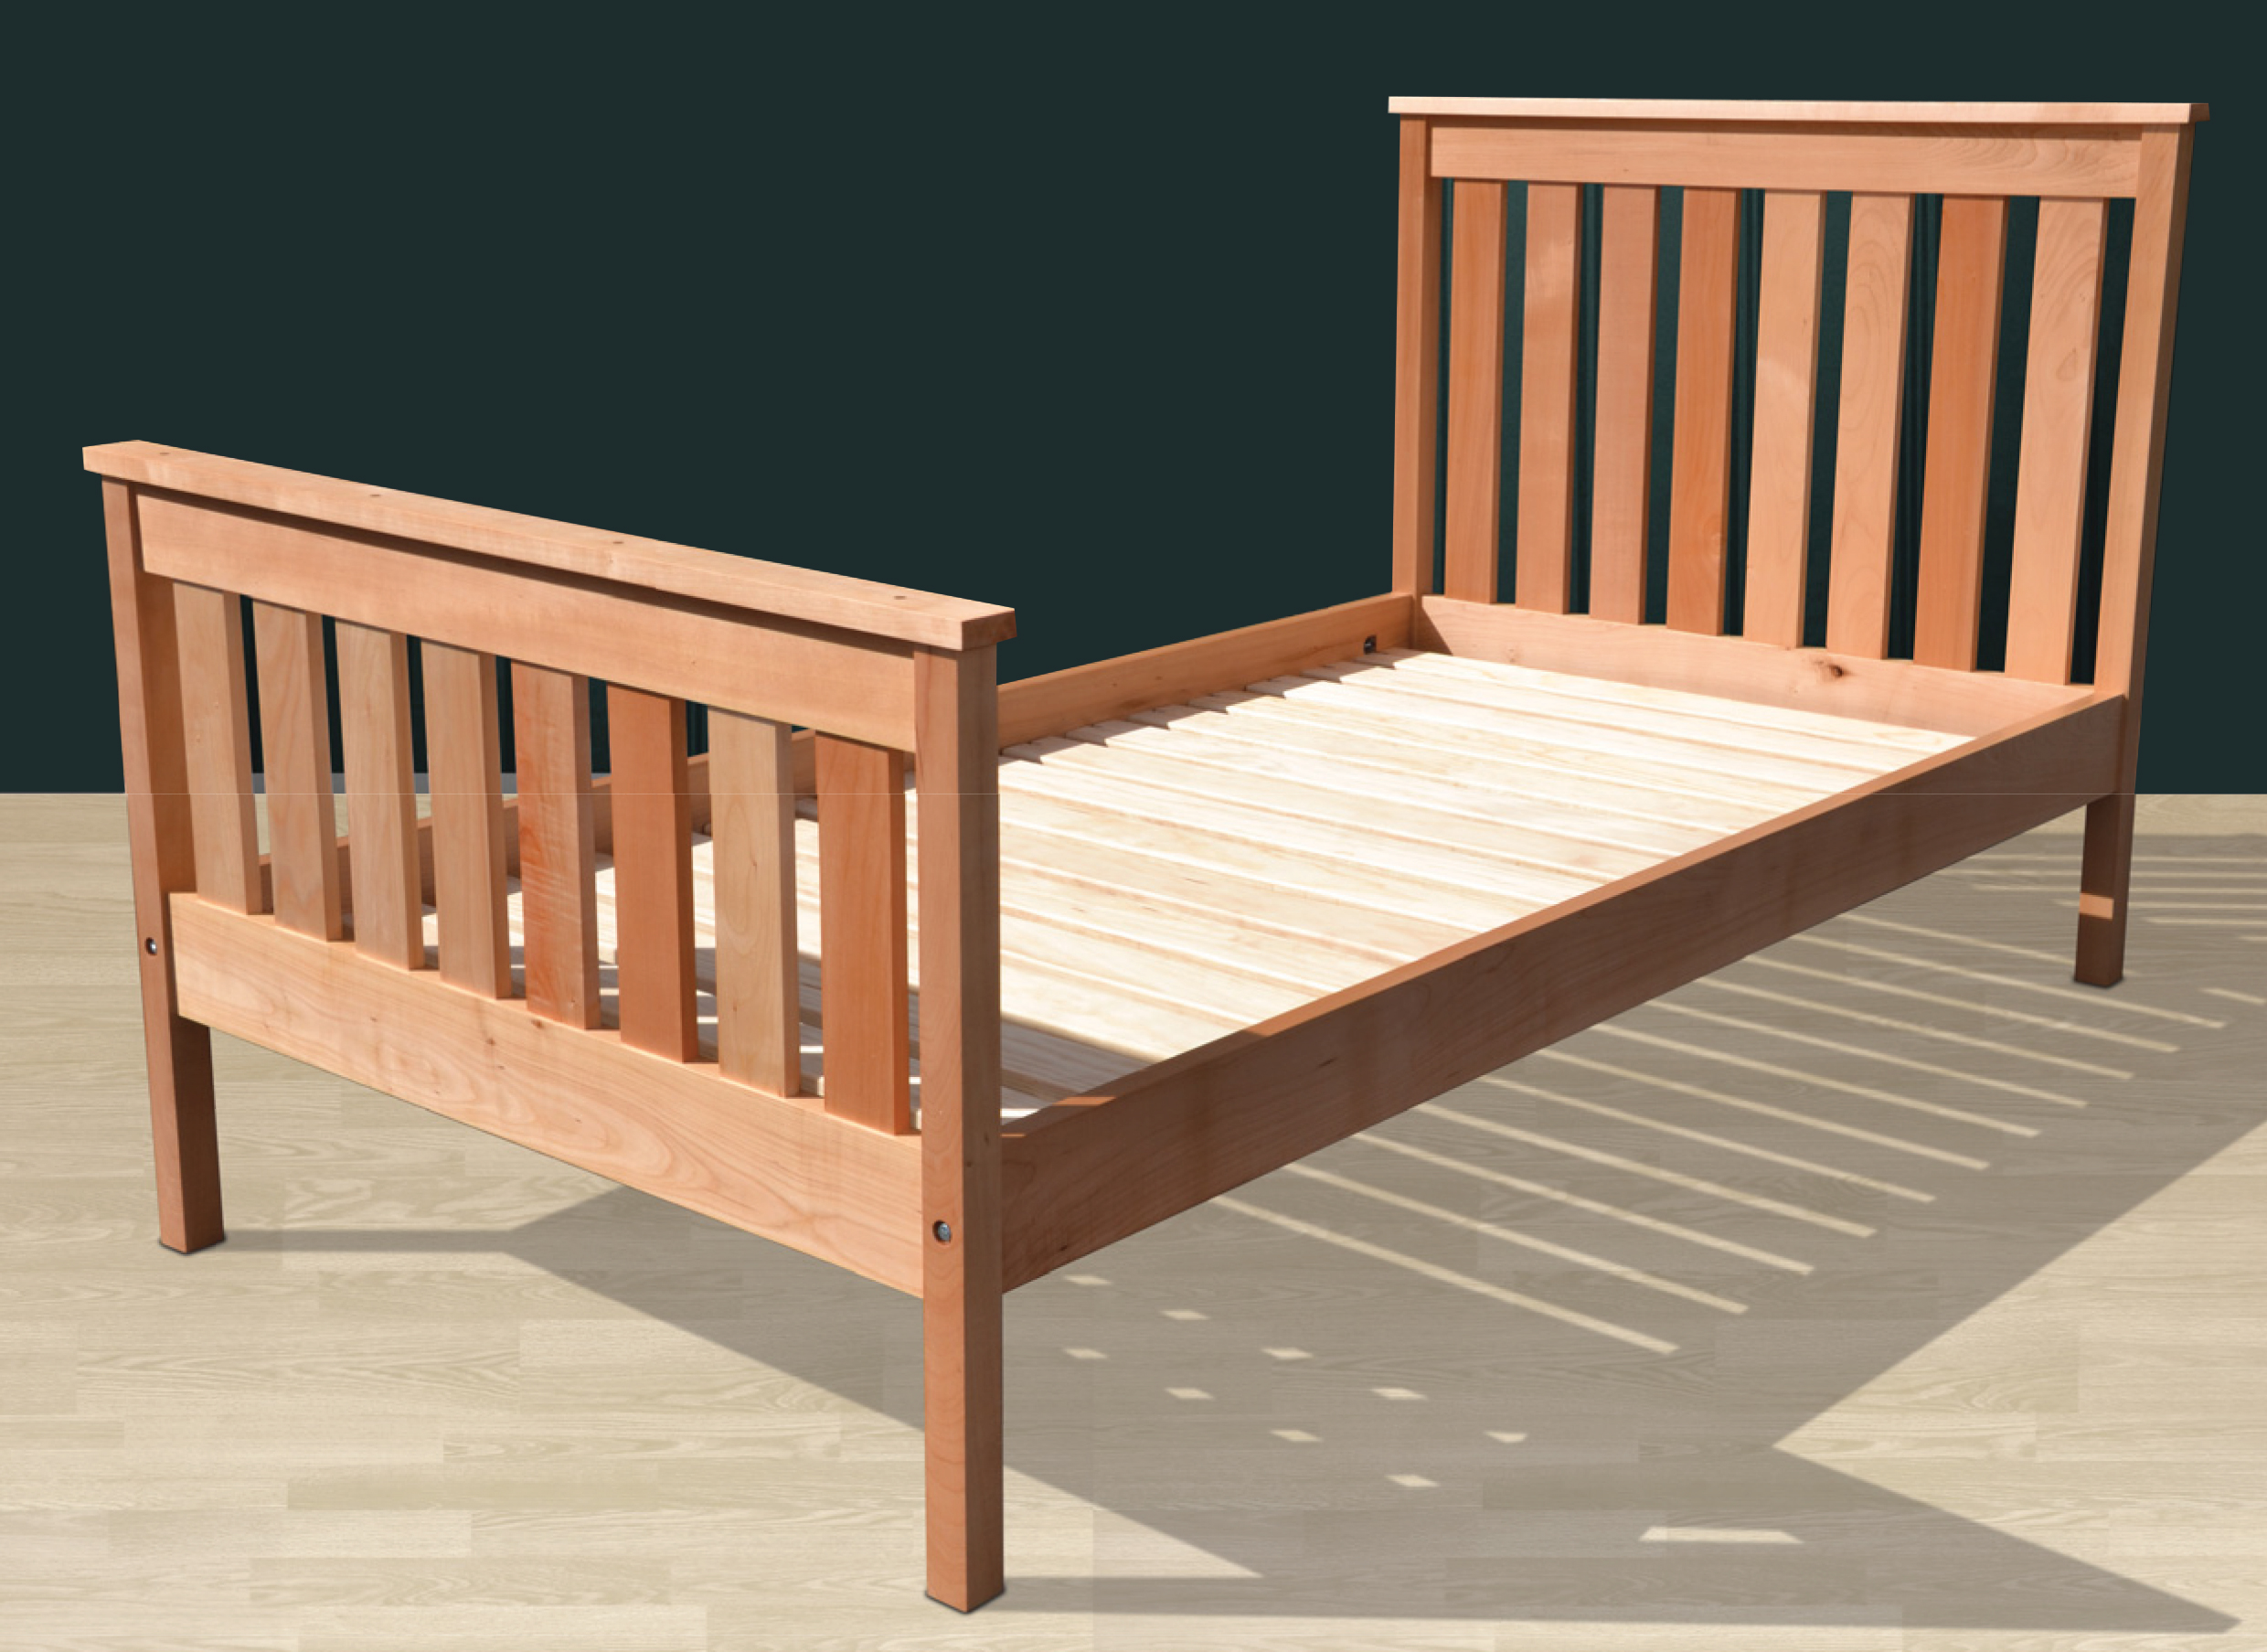
A bed is one of the most important pieces of furniture in the house and in many cultures it was even a status symbol. In ancient Egypt, as well as for sleeping, beds were used as a place to eat meals and entertain socially. Making a bed just has to be one of the simplest exercises that a hobbyist woodworker can undertake. The basic design principles are fairly well-established but there is great scope for personal fl air in how the final product looks. It is just four posts and something to hold the mattress.
The bed in this article was made specifically for one of my grandsons; I have previously made similar beds for my two other Christchurch-based grandchildren.
To match other furniture in my daughter’s house, I have made it out of beech and finished it with three coats of Danish oil. Almost any type of timber can be used, depending on the look you require for the finished product. My daughter asked for a “chunky look” and, as it was a boy’s bed, I wanted it to be able to withstand almost anything thrown at it.
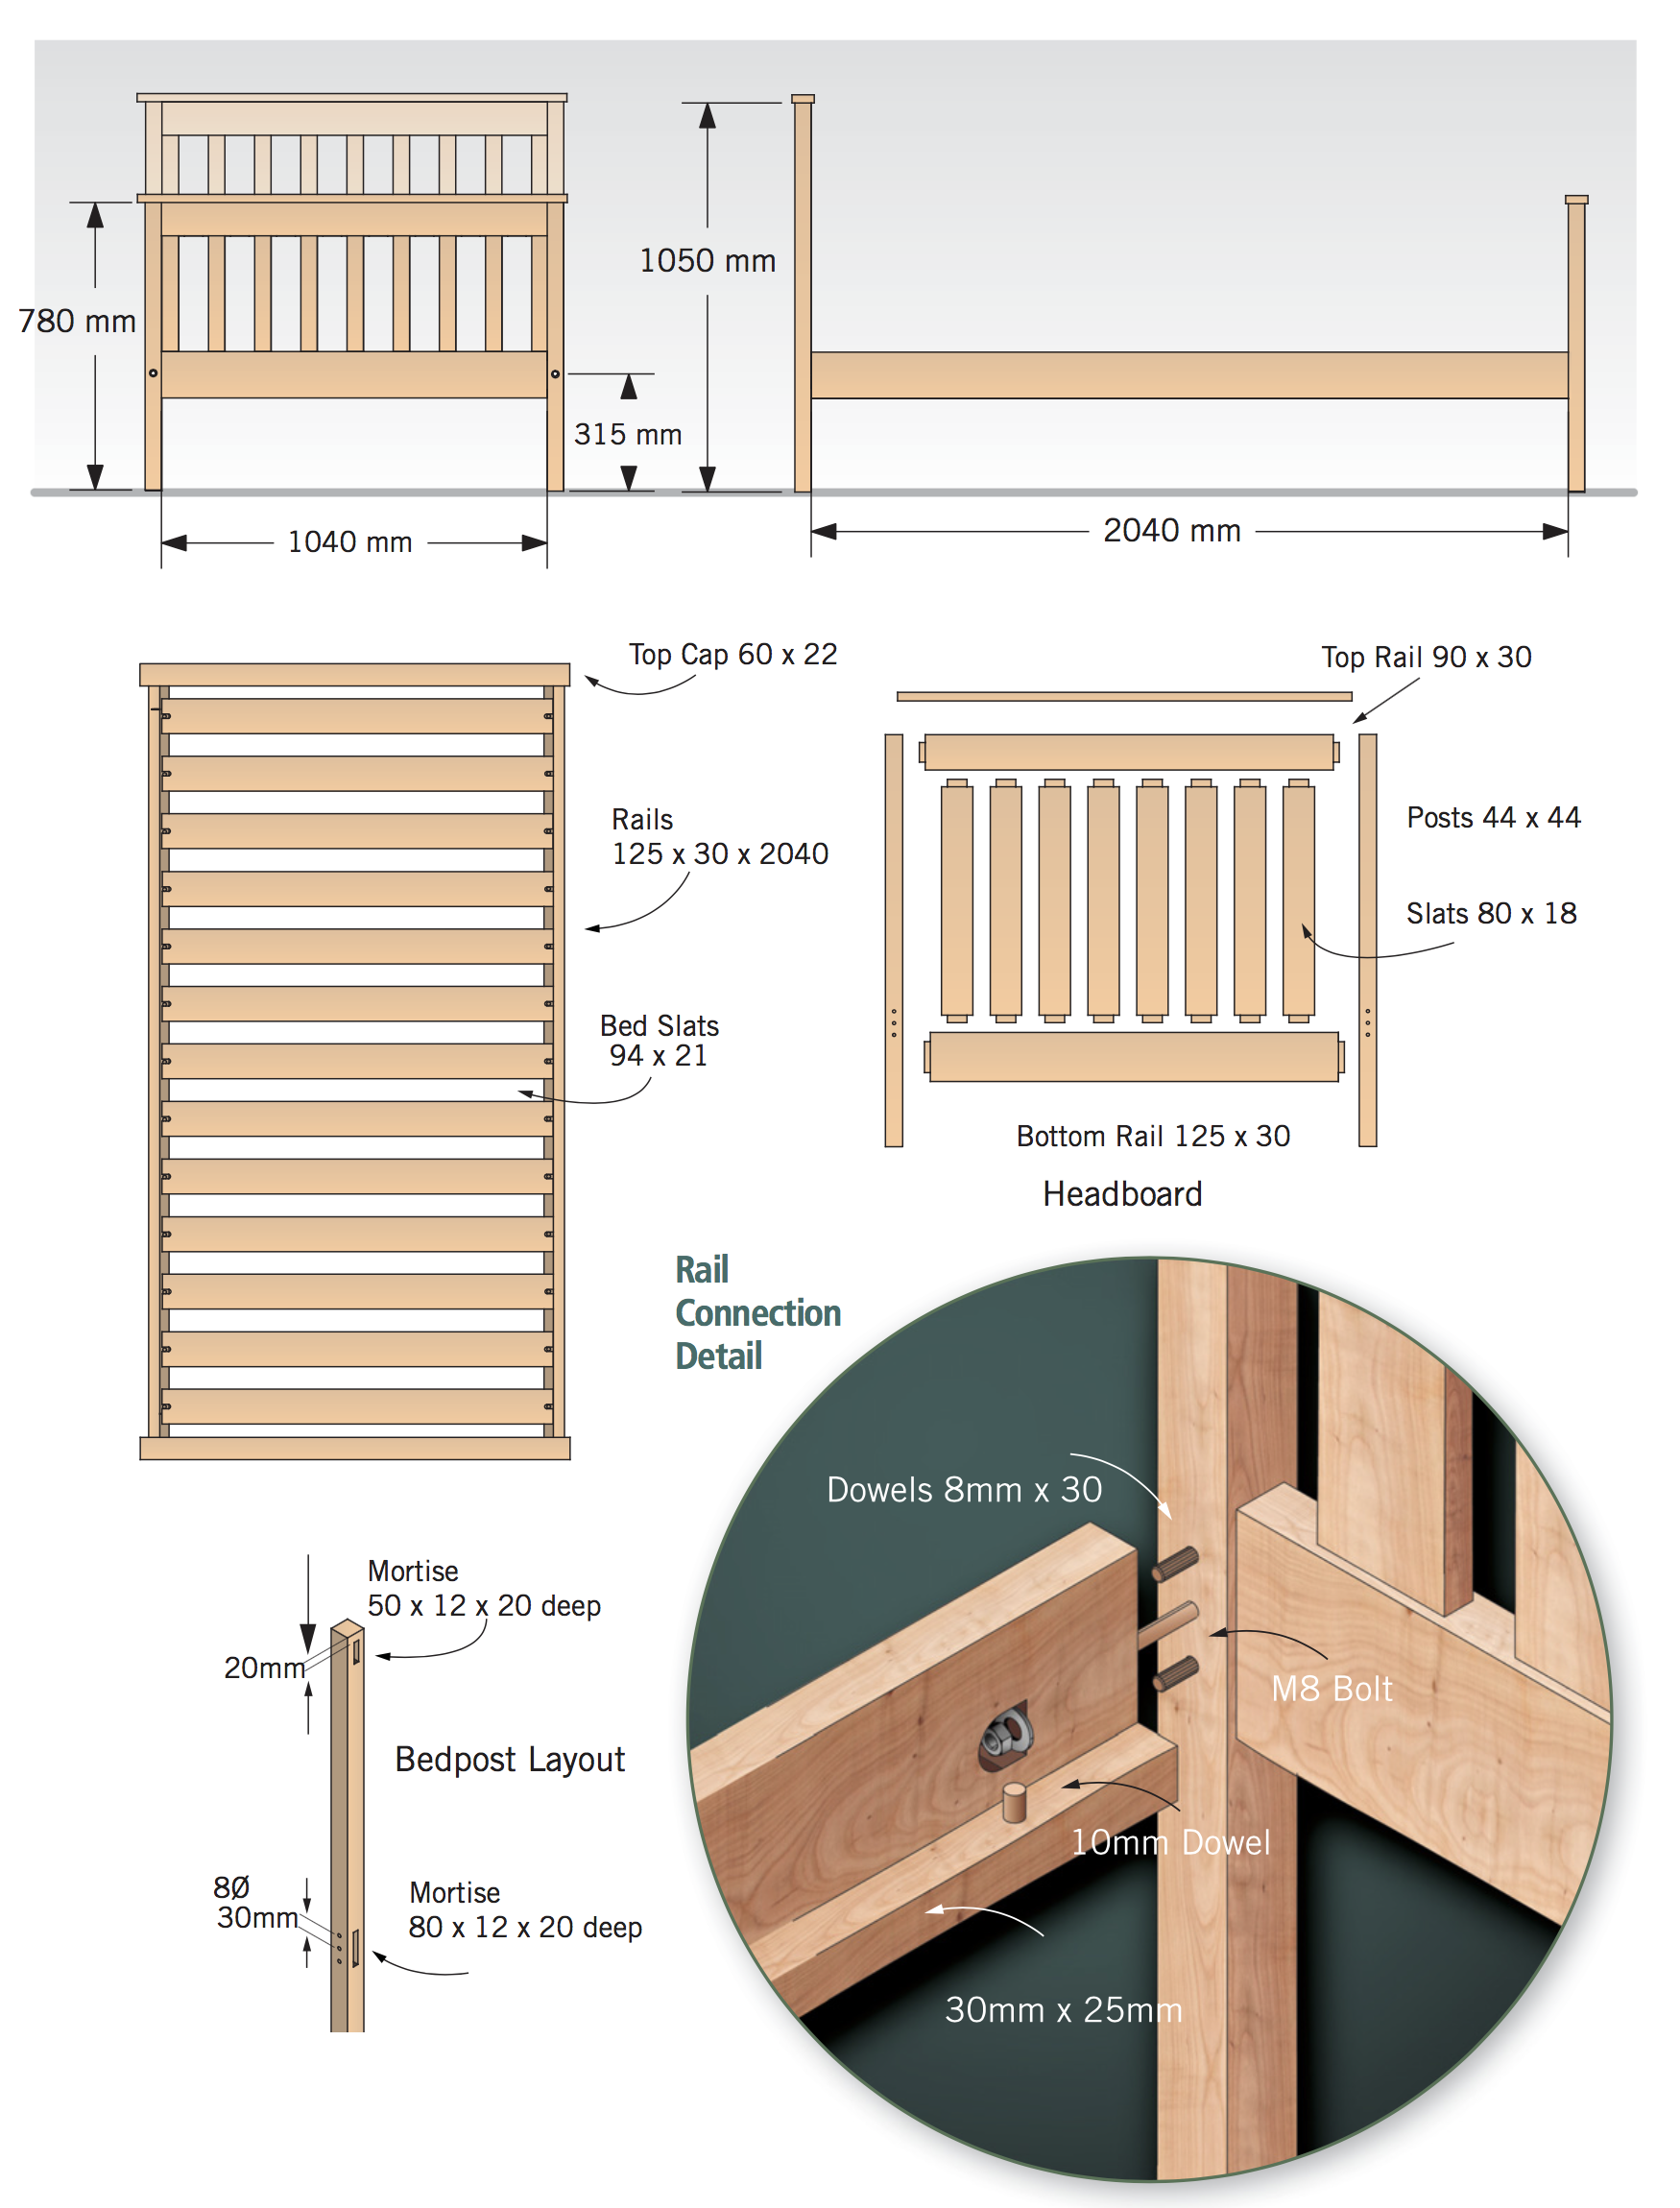
King-single
This bed is a king-single which one local mattress manufacturer says is a nominal 1055 mm x 2030 mm. I suggest you decide on the mattress you are going to use and then ensure that the size of the bed you make fits the mattress. Check for any variation in the size of a “king single” or whatever mattress you decide to buy.
I bought my mattress from the manufacturer here in Christchurch. Before I made my first king-single bed many years ago, I visited several retailers and measured the mattresses to ensure things would all fit together nicely at the end. Do not forget that allowance needs to be made for the blankets to tuck in, particularly at the ends. You could use the same design or concept to make any other size bed by just altering the measurements.
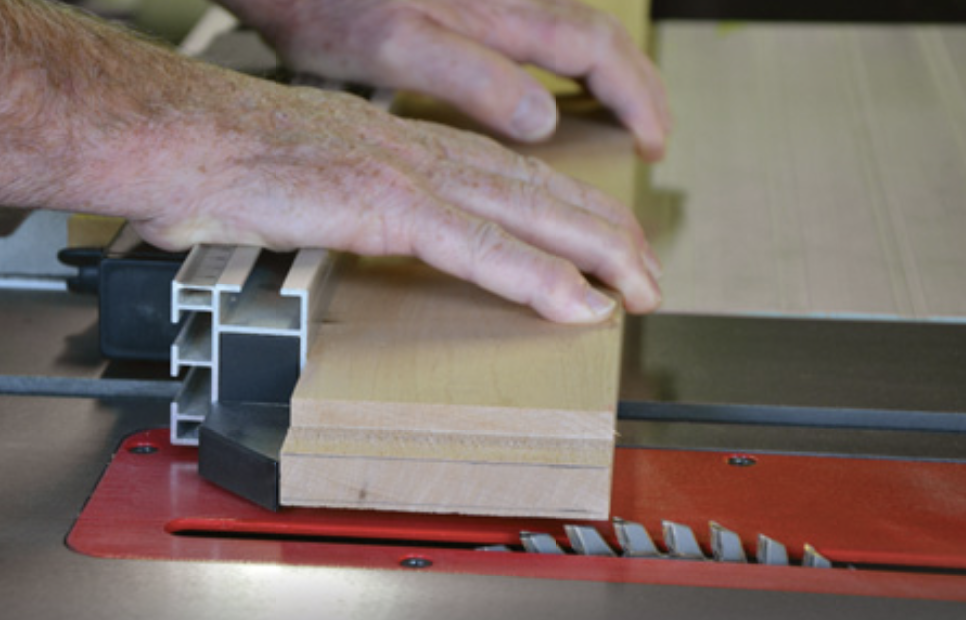
Preparing tenons.
Drawing
Before even buying the timber, I drew the bed out at 25 percent scale. This was to ensure that the bed-ends design I had in my head looked OK on paper. I toyed with the idea of having a curve on the bottom of the top rail below the cap, but after discussions with my daughter, we decided a squarer look fitted in better with the other furniture I had made for her.
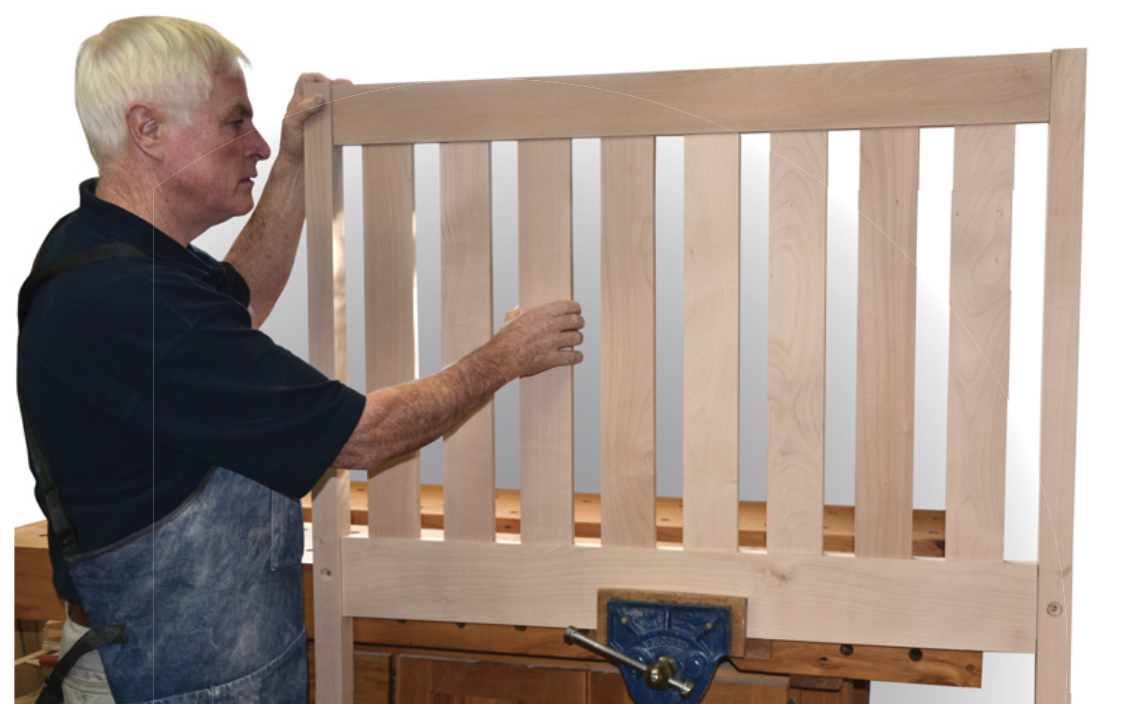
With any children’s furniture, it is vital that you think about safety and that there are no places where clothing could catch. The slats in the two ends have been made far enough apart to stop a child’s hand becoming stuck.
Beech
I have used a lot of beech for furniture over the years but sadly the quality of what I can now obtain has deteriorated. I now need to spend considerable time selecting the timber at the supplier’s yard. The staff are always accommodating and let me pick through the racks as I gradually load my trailer. The cost of the beech plus the pine for the bottom slats was around $450.
I machined the timber for the ends, allowing extra length for the uprights to ensure when I cut the mortises the top did not break away. My thicknesser is designed only for home workshop use and as such I need to take things slowly and ensure that my final cut is the minimum possible. It is much easier to spend a little extra time getting the best possible finish off the machines as it will reduce the time required for sanding later.
I always take my time with the marking out and check it two or three times. It is much cheaper than making a mistake and having to replace the wood.
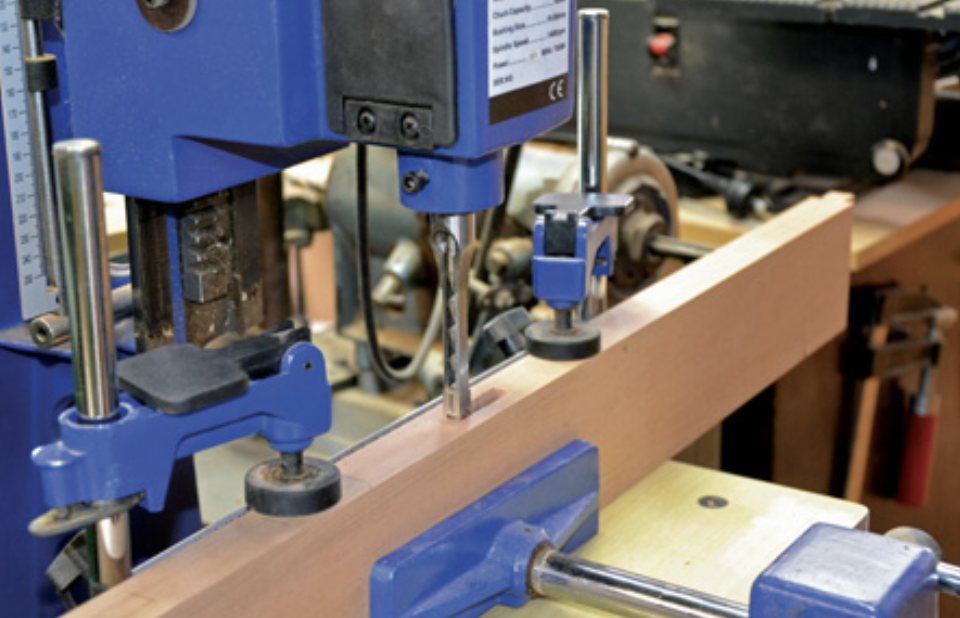
Cutting the mortises.
Mortise and tenon
The ends are all held together with mortise and tenon joints, giving a very large total gluing area. Mortise and tenon joints may initially look a little daunting to make but once you have mastered it they are simple and quick to do.
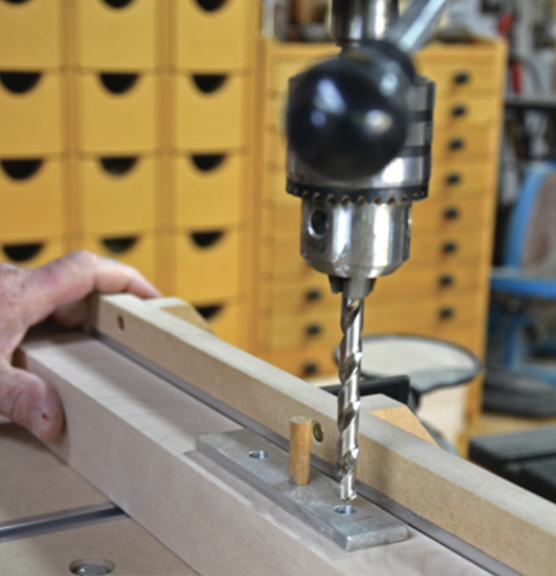
I have a small Chinese mortising machine which I used for this project but cutting them by hand is a very viable option. Once you have completed a few, they can be cut by hand almost as quickly as they are made by my small machine. If you are cutting them by hand, use a Forstner drill bit and drill a series of holes in the centre of where you want the mortise. Clean up afterwards with a sharp chisel.
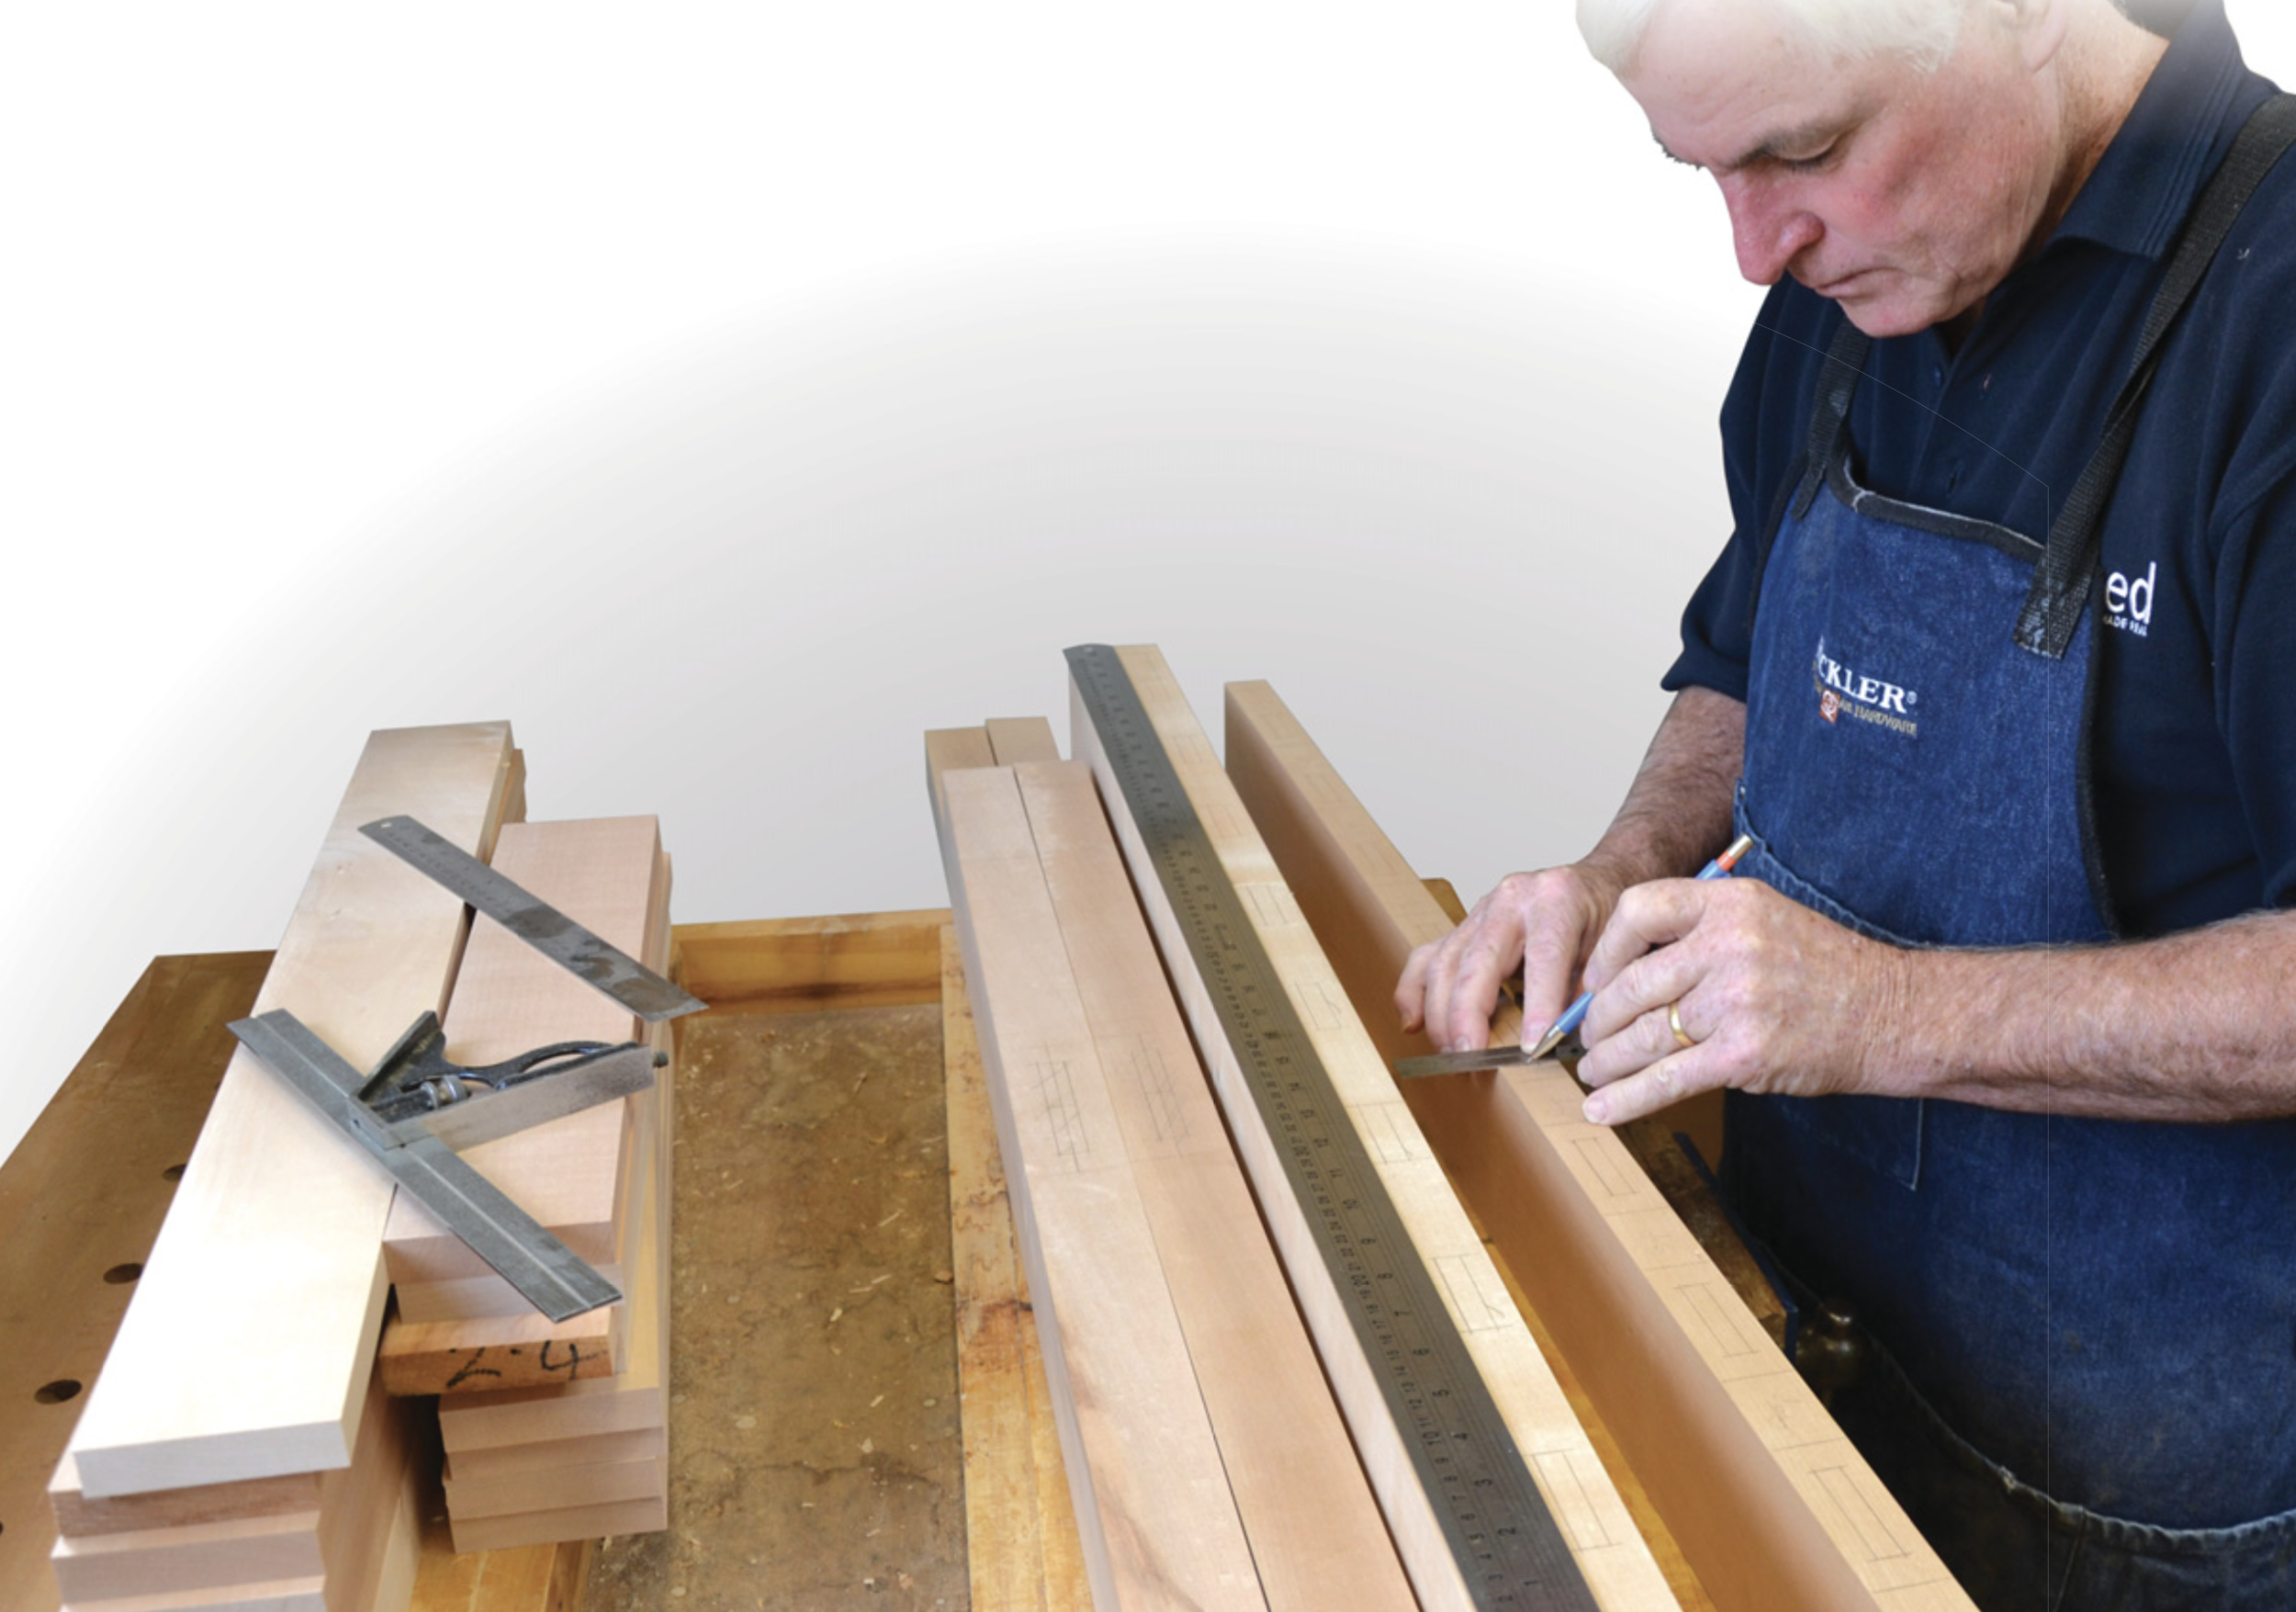
Marking out.
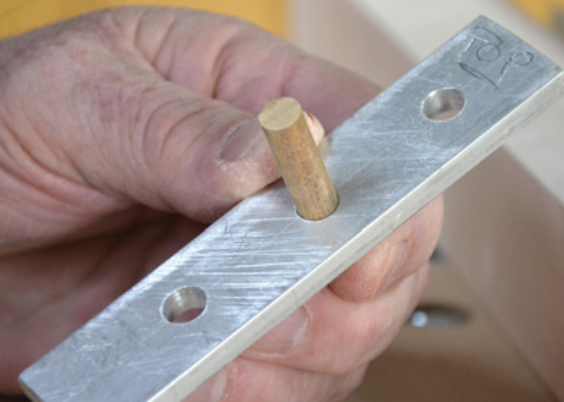
Drilling jig…
…in use.
The slats in the ends have 10 mm mortises and all the other joints are all 12 mm. I always cut the tenons on my bench saw, putting the piece fl at on the saw. By having the tenon in the middle, it is easy to turn the work piece over for the other side. This is not the fastest way of cutting them but I find it accurate for the jobs I do.
I undertake the final fitting with a shoulder plane but aim to take only a very small amount off in this finishing process. The fi t should be tight but not so tight that it wipes off all the glue when fitting.
Dry-fitting the end before gluing.
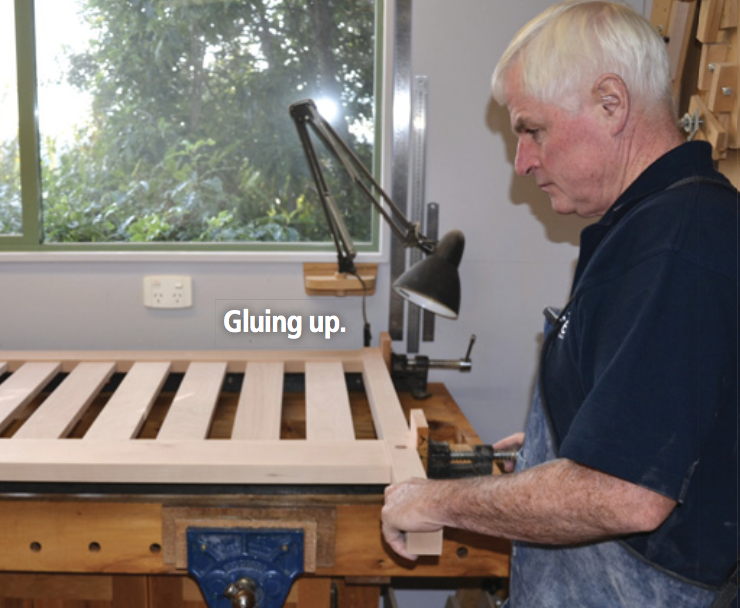
Gluing up.
Holes
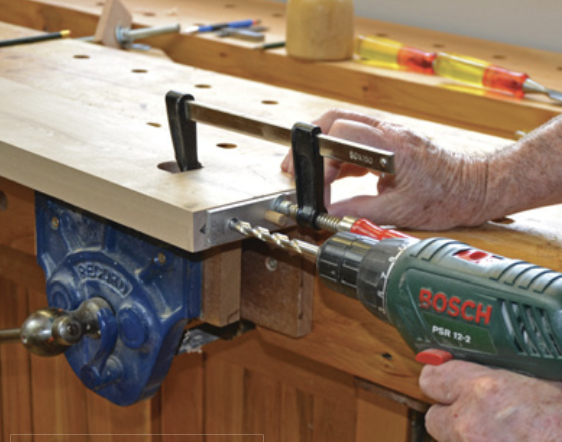
Now you should drill the holes in the legs for the 8 mm bolts and the 8 mm dowels. Use whatever size dowels you wish but I have thousands of 8 mm dowels bought at a clearing sale a few years back.
First drill the hole for the bolt head and to a depth that means the bolt head and a washer will be below the flush line. The bolt hole centre is exactly 315 mm from the bottom of the legs and this should be the first hole drilled. I used a 20 mm diameter Forstner bit and then I drilled an 8 mm hole right through the leg. I had previously made a drilling jig out of a piece of aluminium to ensure the bolt and dowel holes lined up with the holes in the side rails. Be careful to always have the jig facing the same way and it will work like a treat.
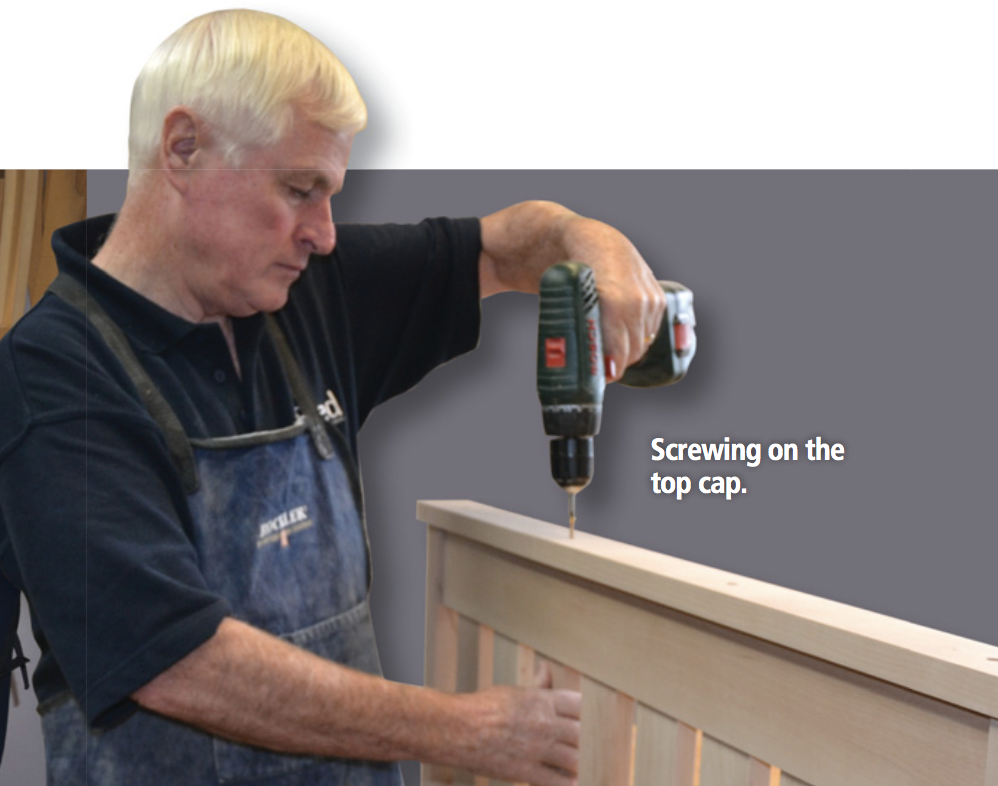
Screwing on the top cap.
Drilling dowel holes in the side rail.
Gluing
As the slats in the ends have mortise and tenons joints top and bottom, you need to take care to ensure that they fi t perfectly before gluing. The four legs also need to be trimmed to length before gluing. The shoulders on the slats in the ends and the top and bottom rails will help keep everything nice and square when you are gluing up but it always pays to check it is all square once you have applied the clamps.
Sand all the components before you glue them up.
The amount of glue you use is important because, when it is assembled, there should be no noticeable squeeze-out. This is very important when you intend to have a stained finish. The glue residue will stop the stain penetrating and leaves a noticeable mark.
The top cap is screwed (four screws) and glued on, a piece of dowel placed in the hole and then cut flush. In my view, the aesthetics of the end grain of the dowel do not detract from the finished product.
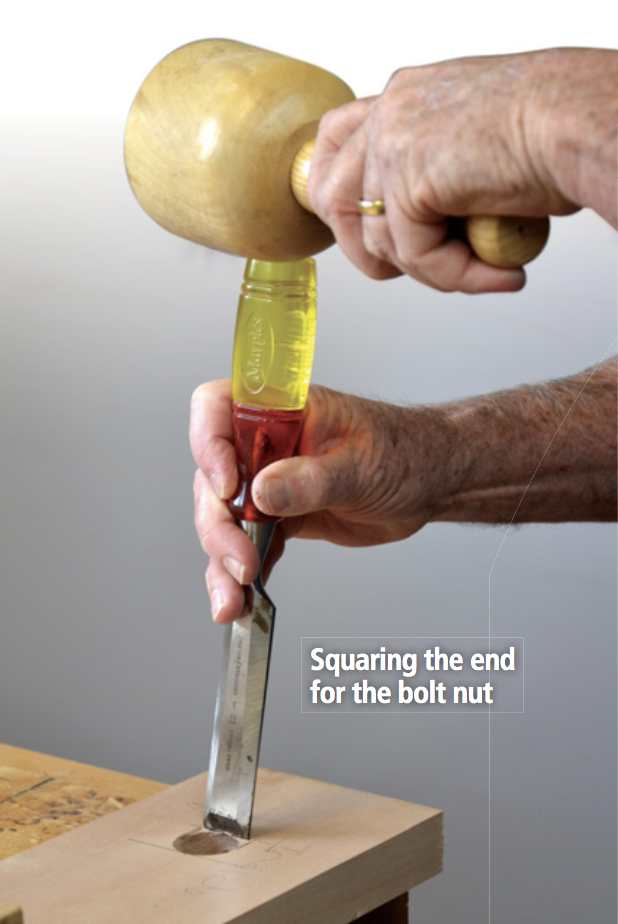
Squaring the end for the bolt nut
Side rails
Now is the time to build the side rails. Buy the bolts before you drill any of the holes as you can adjust the position to suit the length of bolts you obtain. The arrangement for the bolts needs care but is relatively simple to execute. First mark the position for the nut to go in; drill a 30 mm hole with a Forstner bit as far through as possible on the inside of the rail without breaking through. Then chisel the end square.
Carefully drill the 8 mm hole for the bolt ensuring that it remains square and then put the drilling jig in place to drill the dowel holes. I later open the bolt hole to 9 mm but only after I used the drilling jig for the dowels.
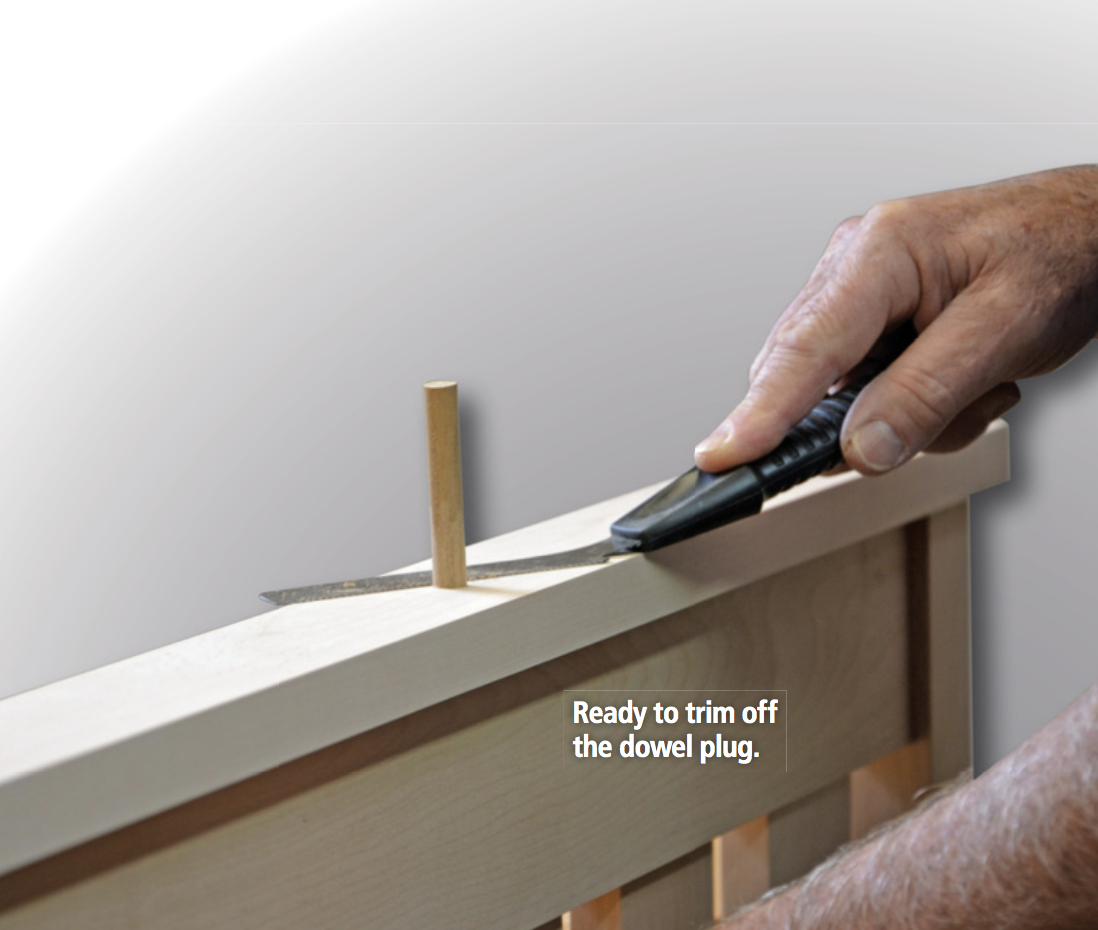
Ready to trim off the dowel plug.
Bottom slat support
A strip needs to be placed on the inside bottom of the side rails for holding the slats. I carefully marked out and drilled a 10 mm hole for the centre of the slats. The position of the slats can be worked out very easily once you have machined the slats. This is: total length of the side rails minus the combined width of the 16 slats, divided by 17; the answer then is the gap between each slat.
Mark the centre of the slats and drill a hole for each dowel. The dowels can then be hammered home with a dab of glue and the strip screwed and glued to the inside of the rails.
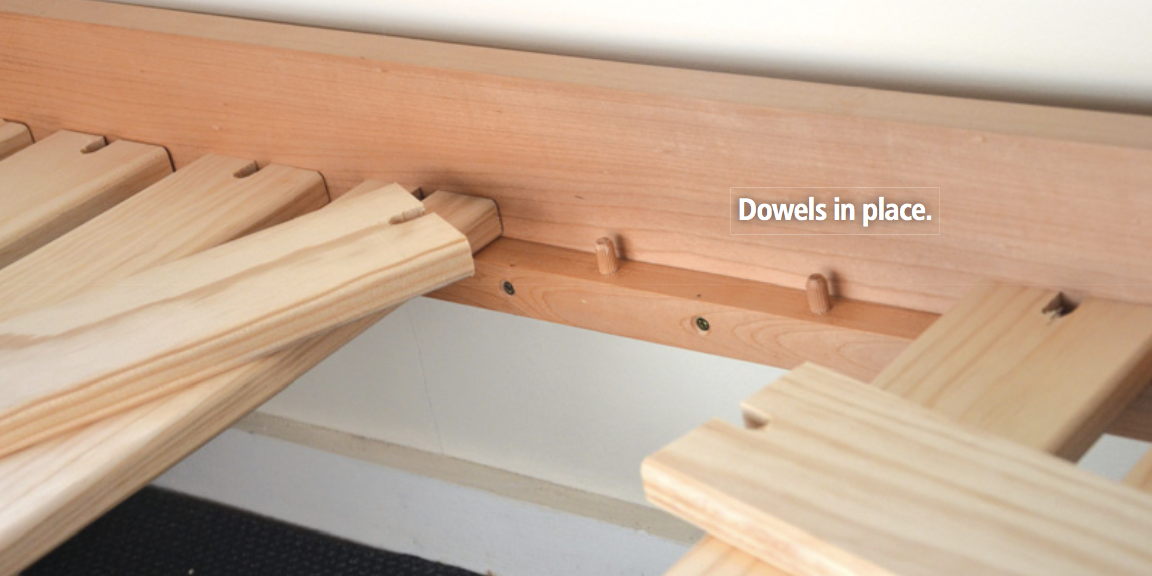
Dowels in place.
Bottom slats
For the bottom slats, I used pine to keep the cost down a little. I machined them out of 100 mm x 25 mm pine pieces that cleaned up to about 94 mm x 21 mm. I used 16 slats but this probably is over-engineering a little. However, I always tend to err this way. I put a small radius on the four edges of each slat for ease of handling and to make everything feel nice. The bottom slats have a slot at each end which drops over dowels in the side rails to hold them in place.
I finished the bed with three coats of Danish oil. The bed is now ready for when Rupert is ready in a few months to transfer from his cot which I made had made previously.