By Len Gale
Learn how to sharpen those blunt drills
Len sharpening drills.
Have you sometimes fought to drill through a piece of wood or metal and then quietly, or noisily, reached the conclusion that it was time to get a new drill? You should think first about buying a new drill for the most efficient work in your shed, or as a second thought, perhaps you could try re-sharpening the drill bit. It does require a bit of skill.
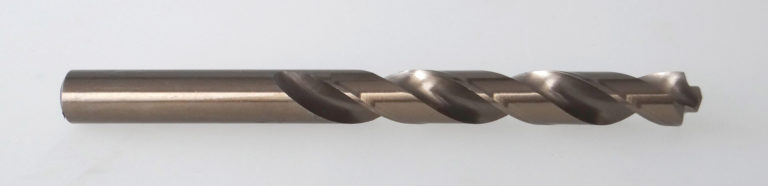
Before re-sharpening a worn or broken drill it is advisable to study a new drill. With a protractor, measure the angle of the cutting edge. It will be 59°. This angle, combined with the helix angle (the spiral) of 28° or up to 30° on standard jobber drills, creates the straight cutting edges that do the work. This is about the same op rake that lathe tools have for general machining. The point with the included angle of 118° like the bow of a ship, helps keep the drill on track. A drill that has been sharpened with an almost fl at point wobbles all over the place. Also, if the included angle of the drill point is less than 118° the cutting edge will be convex. If the included angle of the drill point is more than 118° the cutting edge will be concave. The aim is to get a straight cutting edge for 100 percent efficiency. For all general work in sheds, I assume it will be just as well to stay with the way a new drill has been ground.
Twist drill cutting edge gauge.
Morse taper drill gauge. The lines scratched on the chalked area by the cutting wings should match. Note spike fi tting in the end of the drill.
Besides re-grinding the angle correctly, you have to have each of the two cutting edges the same length.
To allow the drill to penetrate the metal, the body of the drill behind the cutting edges must be backed off at an angle of between 12° and 15°. For small drills 3 mm and below you can back off up to 18°. Too much and the edge will soon fail; too little and the “heel” will rub and the drill will not cut.
I had an early experience of how to sharpen drills. When the machine shop foreman was sure I was the culprit, (we won’t go into that) he sent word that I was to report to Jock the tool storeman. Jock was a man of few words. He simply pointed to three buckets of broken and chipped drills of various sizes, handed me two gauges and told me to make a start. The larger drill bits had been broken on the radial drill machines where the radial arm lets you position the toolhead at various distances from the column. As the drills made their exit, they were damaged when they hit lugs or clamps.
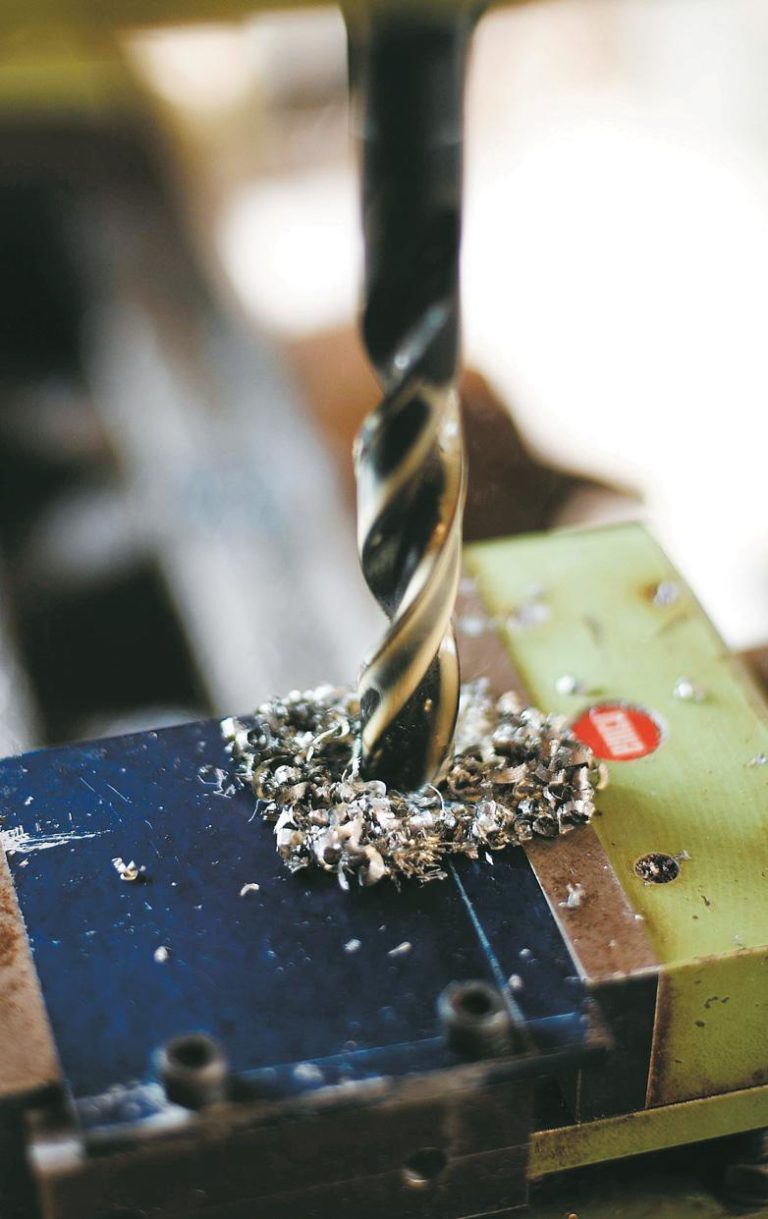
The tool-sharpening area had several grinding machines. One had a cup wheel, which meant that drills could be ground on the side of the wheel. First I had to remove the jagged ends on the cut-off wheel, and there was a shower of red sparks that confirmed the drills were High Speed Steel (HSS).
Stormy Knight kept an eye on my progress. Unlike Jock, he was a man of many words and although he was a big strong man he kept saying, “give me strength!” Whatever happened, I had to keep the drill cool and not draw the temper. I was soon standing in a puddle of water as I quenched the hot tools into water.
Grinding the cutting edge.
The newly ground edge. Note that the fl ank is also ground.
Gauges
Stormy showed me that one gauge had chisel cuts and numbers to keep track of the length of the cutting edges. I had to check that the two cutting edges were at the required angle of 59° and the same measurement. Stormy explained that the flutes allowed the swarf to escape, the coolant to enter and they provided the cutting angle for steel and aluminium. Most interesting.
The other gauge had a spike at one end that fitted into the centre hole in the end of taper shank drills. The upper panel of this Morse taper gauge had a chalked area. On this the corner of the cutting edge scratched a line, which had to coincide with the scratch from the other corner. Thus, if both cutting edges were the same angle and length, if both scratches lined up and the back clearance was correct (12° to 15°), the drill would cut metal with two equal shavings and the drill machine’s motor would not be overloaded.
I soon developed a technique of swinging the drill across the grinding wheel, resting on my left hand which rested on the tool rest, pivoting on the point and at the same time dropping my right hand slightly to create back clearance. Too much back clearance and the cutting edge may fail, too little and the heel would rub, restricting progress through the metal, if not preventing it. This caused me no end of trouble, until I gave the drill a slight clockwise twist as I lowered my right hand.
NOTE:
If the angles are the same but one edge is slightly longer than the other, the drill will cut slightly over-size. This can be turned to one’s advantage if you need a small amount of clearance. If you drill a pilot hole first, however, the drill will cut to size.
Drills that have been broken or have been repeatedly re-sharpened have thick webs; that’s the sort of spine that runs down the centre of the tool between the two flutes. The reality is that twist drills have four cutting edges, two little ones in the centre and the two that do the real cutting. Holding the end of the drill up, I was able to blend the web into the flutes on the corner of the grinding wheel.
Relieving or grinding away the web…
…, blending the web into the fl utes.
Lands
To cut back on friction, drills have body relief. Most of the body is ground back leaving a narrow land on the edge of the flutes. This is the drill’s diameter. Sometimes the lands get worn away when drilling tough steel. This may cause the drill to bind in the hole and/or result in undersized holes. The drill can be rescued if you grind the end back to the position where the lands are not damaged, and then re-sharpen it.
Sheet-metal engineers re-sharpen their drills to prevent the metal piece riding up the drill. A disk forms on the end of the drill and you have to remove this after each hole. Not only is using a re-sharpened drill a safe way to drill sheet metal, you end up with a round hole, instead of a three-cornered one and a zoom up the drill. Use a moderate speed as the cutting edges are on the delicate side. Wood grain tends to make pointed twist drills wander but because this re-sharpened twist drill cuts the wood fibres, the holes will be where you want them.
The newly ground drill.
Back when I was sharpening drills as part of my punishment, I discovered there were slow spiral and straight-fluted drills for brass and plastic. You may need a straight-fluted drill. You can create this by “backing off” the first 3 or 4 mm of a spiral-fluted drill.
A Stellite drill, consisting of three straight flutes and a three-sided point, is used to drill very hard metal. The drill press is set at top speed, the part rested on a metal base in the vice and considerable pressure applied to the handle. There’s no coolant because this is a heat process. The drill heats up the material to cause metallurgical changes in the material and to penetrate. Three red-hot shavings and the hole is through.
My punishment lasted several days, Jock was able to restock his shelves and he was happy. I learnt valuable lessons and the foreman greeted me with a smile, but sadly there is no known cure for mischief.
TIP: To save constant re-sharpening, two sets of drill are a good idea.
Drill showing the body relief ground into the spirals. This helps to reduce friction.
A twist drill sharpened on the corner of the grinding wheel to produce a central point and two outer cutting edges that will safely drill holes in sheet metal.